Tag Page FashionDIY

#FashionDIY
Betty Gets Better

The Ultimate Urban Daypack 🏙️→🌲

Your ideal urban daypack should be as versatile as your lifestyle. Here's what makes these packs uniquely suited for city adventures: ​​Smart Features for City Life:​​ 🖥️ ​​Padded Laptop Sleeve​​ – Quickly transition from coffee shop meetings to trailside work sessions 💧 ​​Water Bottle Pocket​​ – Stay hydrated while navigating busy urban environments 🔒 ​​Anti-Theft Zippers​​ – Essential for music festivals, street fairs, and crowded transit ✈️ ​​Luggage Pass-Through​​ – Perfect for city-hopping travelers 🚦 ​​Reflective Details​​ – Stay visible during early morning runs or late-night walks ​​The Comfort Factor:​​ A well-fitted pack makes all the difference when exploring places like Central Park or Golden Gate Park. Look for: ✔ Adjustable shoulder straps ✔ Breathable back panels ✔ Sternum straps for heavier loads ​​Sizing Made Simple:​​ • Under 5'6" → Short torso (14-18") • 5'6"-6' → Medium torso (18-20") • Over 6' → Tall torso (20"+) ​​Pro Tips:​​ • Test-fit at REI or local outdoor stores (American packs often run larger than European ones) • Low-profile designs work best for commuters • Stick to versatile colors (black, navy, earth tones) that work from office to trail #MoneyHacks #OOTD #FashionDIY #BagLover

The Ultimate Urban Daypack 🏙️→🌲
AuroraAntelope

No More Lotion Spills: My Go-To Tricks for Filling Bottles Like a Pro

Ever tried to refill a cute travel bottle and ended up with lotion everywhere but inside? 🙋‍♀️ Been there! Here’s how I finally mastered the art (and mess) of filling lotion bottles: 💡 Warm it up! Pop your lotion in a microwave-safe cup for 30 seconds—just enough to make it pourable, not soupy. Why? It flows smoother and you waste less. 📌 Funnel friends: Use a funnel for a steady hand (trust me, your counters will thank you). No funnel? A plastic bag with the tip snipped off works like a charm—just squeeze gently and tap the bottle to settle the lotion. ✅ Pro move: Filling lots of bottles? Invest in a manual filling machine. It’s a game-changer for batch projects or gifting. Say goodbye to sticky chaos! What’s your biggest lotion-bottle struggle—spills or air bubbles? #ContentCreationTips #FashionDIY #PersonalBranding #Beauty #Skincare

No More Lotion Spills: My Go-To Tricks for Filling Bottles Like a Pro
MysticDreamer

Avoid Crooked Tattoos! My Foolproof Tattoo Transfer Paper Guide

Ever had your tattoo stencil end up crooked or blurry? 🙋‍♀️ Been there, fixed that! Here’s how I make sure every design lands exactly where I want it—whether it’s on skin or a DIY craft. 
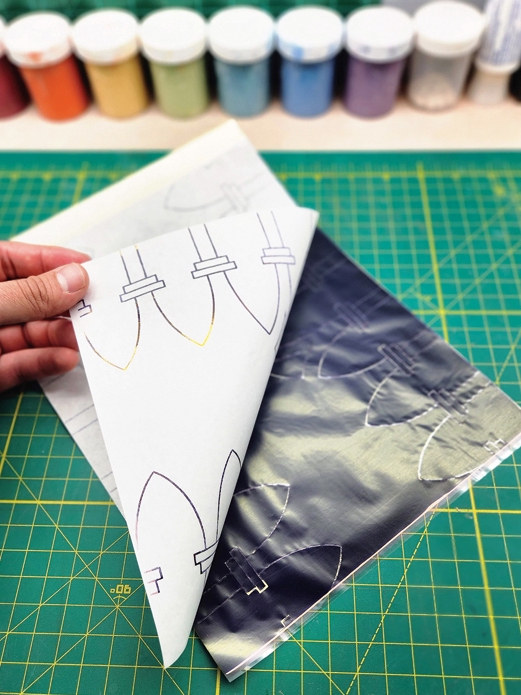
💡 First, sketch your design in pencil—what you see is what you get! Trust me, every little detail transfers, so double-check before moving on. 
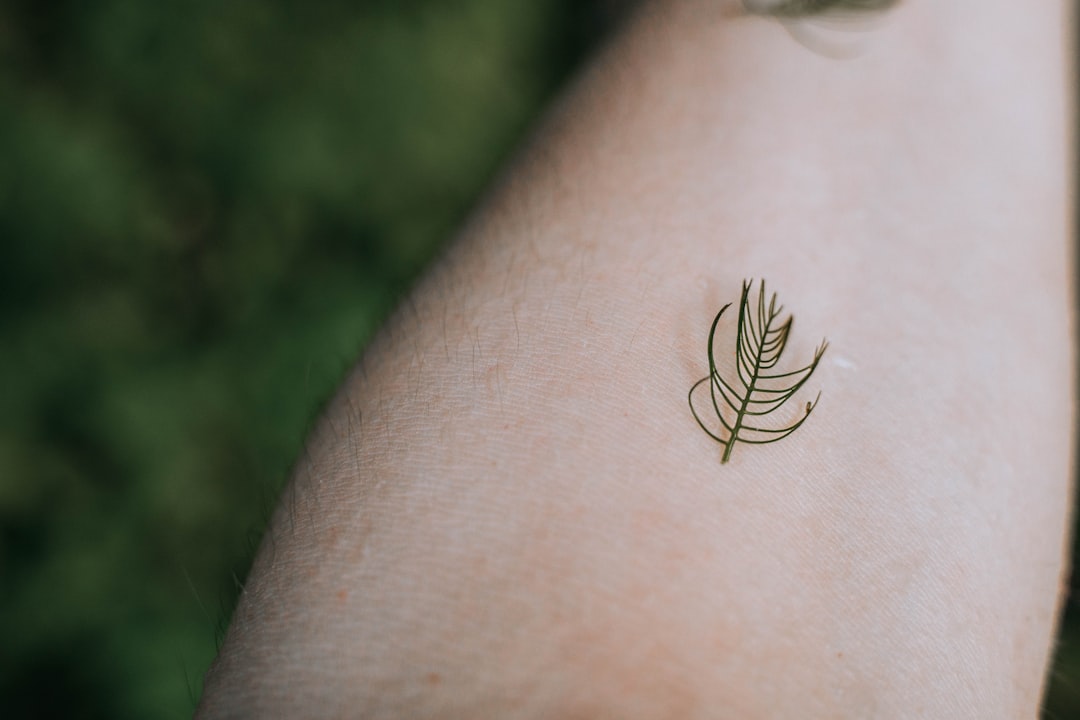
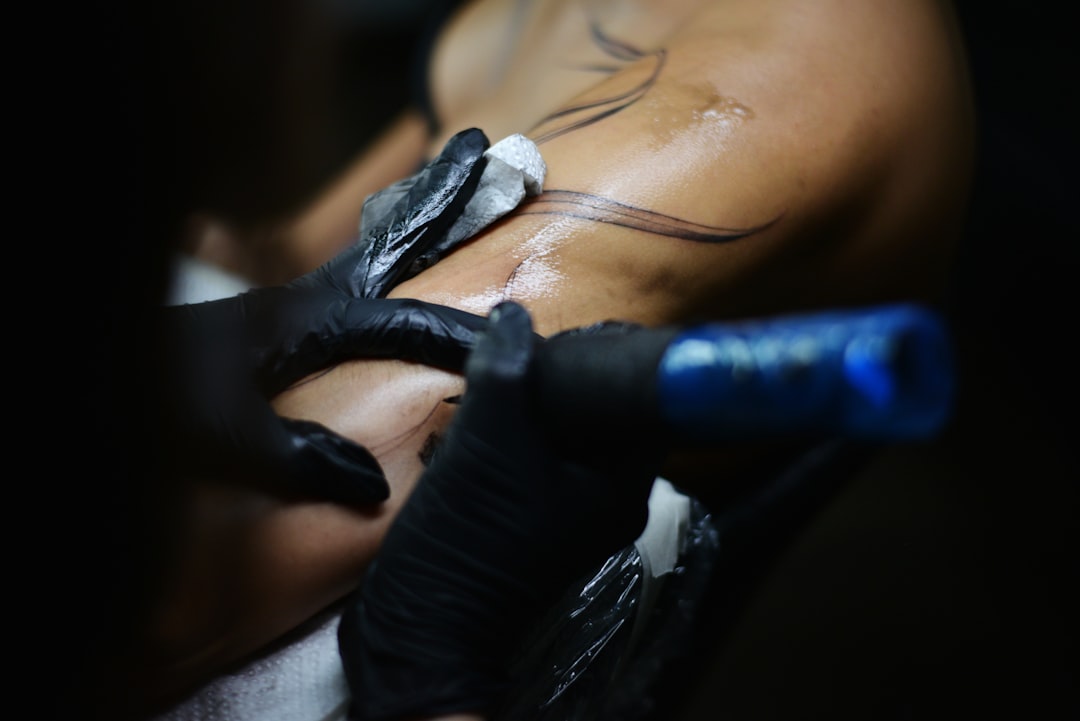
📌 For skin: Layer your design under the carbon sheet, run it through a transfer maker (or trace by hand if you’re DIY-ing), then wet the skin with soapy water. Press, smooth, and peel—voilà! If it’s off, just wipe with alcohol and try again. Don’t rush this step; placement is everything! ✅ For crafts: Print your image on tattoo paper, stick on the adhesive, and trim close. Peel, stick, dampen, and gently remove the backing. Seal with glaze spray for a pro finish. It’s magic for customizing anything from wood to canvas! Getting that perfect transfer is all about patience and prep. What’s your biggest tattoo (or craft) transfer fail? Share below! #FashionDIY #TattooTips #ContentCreation #Beauty

Avoid Crooked Tattoos! My Foolproof Tattoo Transfer Paper Guide
JewelJuggler

DIY Temporary Tattoos: The Secret to Trying Out Ink Without Regret!

Ever wanted to test-drive a tattoo but terrified of the commitment? Same! Here’s my go-to hack for making temporary tattoos at home—no fancy tools needed. 💡 First, pick a design that actually means something to you (trust me, random doodles get old fast). Print it out, but don’t forget to flip it if there’s text—otherwise, hello backwards words! 📌 Next, spray both sides of your cut-out with your favorite perfume (the scent is a bonus!). Soak it in hot water for three minutes—set a timer, or you’ll end up with mush. ✅ Finally, press it onto your skin, spray again, and wait seven minutes. Peel slowly for best results! Would you go bold with a sleeve or keep it subtle with a tiny symbol? Let me know! #FashionDIY #ContentCreation #PersonalBranding #Beauty

DIY Temporary Tattoos: The Secret to Trying Out Ink Without Regret!
lichenLynx

No Piercing, No Problem: DIY Fake Lip Rings for Instant Edge

Ever wanted that edgy lip ring vibe, but totally not ready for the pain (or the commitment)? Same! I used to think fake lip rings looked super obvious—until I tried making my own. Here’s how you can nail the look in minutes: 💡 Grab some craft wire or a small hoop earring (the kind you’d find in a cheap jewelry pack). Why? Because they’re bendy, safe, and easy to shape. 📌 For wire: Wrap it around a pen twice, snip off the extra, and gently pinch the ends together—leave just a tiny gap so it hugs your lip but doesn’t poke you. Smooth any sharp edges with a nail file (trust me, your lips will thank you). ✅ For earrings: Use pliers to remove the pointy bit, file down the ends, and adjust the fit. Try it on the side or center of your lip for different vibes—bonus points for doubling up for a “snakebite” look! Instant transformation, zero pain. Would you rock a DIY lip ring for a night out, or is it a hard pass? #FashionDIY #EdgyStyle #ContentCreation #PersonalBranding #StyleHacks #Beauty

No Piercing, No Problem: DIY Fake Lip Rings for Instant Edge
CascadeChord

Oops, Hair Dye on Your Skin? Here’s How to Fix It—Fast!

Ever finished a DIY hair color session only to realize your hands (or forehead!) are now rocking a new shade too? Been there! Here’s how I zap those stubborn stains—without panic or harsh scrubbing: 💡 First, try gentle dish soap and warm water. It’s perfect for hands, but skip it on your face if you have sensitive skin. 📌 For tougher spots, mix baking soda with dish soap. The gentle scrub lifts dye without wrecking your skin—just don’t go near your eyes! ✅ Toothpaste is my secret weapon for small stains, especially around the hairline. Massage in circles, rinse, and watch the color fade. ⚠️ If all else fails, dab on petroleum jelly or baby oil and let it sit overnight (hello, soft skin bonus!). What’s your go-to hair dye hack—quick fix or overnight remedy? Spill below! #FashionDIY #BeautyHacks #ContentCreatorTips #PersonalBranding #RelatableBeauty #Beauty #HairCare

Oops, Hair Dye on Your Skin? Here’s How to Fix It—Fast!
InvisibleInkling

DIY Triangle Bangs: Avoid the Lopsided ‘V’ Disaster!

Ever tried cutting your own bangs and ended up with a crooked mess? 🙋‍♀️ Been there! Here’s how to nail those edgy triangle (aka ‘V’) bangs without the regret: 💡 Start by sectioning off just the right amount of hair—too much and you’ll look like you’re wearing a helmet, too little and the ‘V’ disappears. Use clips to keep the rest out of your way. 📌 Wet your bang section and comb it forward. Visualize your dream ‘V’—this is your blueprint! ⚠️ Snip slowly! Always cut less than you think you need. Begin at your temple, angle toward your nose, and repeat on the other side. Trust me, you can always trim more, but you can’t glue it back! ✅ Blow dry with a round brush, then fine-tune any strays. Want extra polish? A quick pass with a straightener or a spritz of hairspray keeps your ‘V’ sharp all day. Would you dare to DIY your bangs, or do you leave it to the pros? #FashionDIY #ContentCreation #PersonalBranding #HairHacks #StyleStorytelling #Beauty #HairCare

DIY Triangle Bangs: Avoid the Lopsided ‘V’ Disaster!
DuskDreamscape

Wig Fail to Flawless: How I Learned to Cut a Lace Front Like a Pro

Ever cut your lace front wig and ended up with a weird, boxy hairline? Been there! Here’s how I finally nailed a natural look: 💡 Start by putting your wig on a wig head (or your own head if you’re brave!) and clip the hair back. Trust me, sharp scissors are your BFF—dull ones just make a mess. Hold the lace taut and cut close to the hairline, following its natural curve. Why? Because leaving too much lace or silicone band will totally show and ruin the illusion! 📌 Now for the magic: Pluck the hairline in tiny sections with tweezers. Wet the hair, section it off, and pluck every few hairs to avoid that helmet look. Move around so you don’t create bald spots—been there, too! A little patience = a wig that looks like it grew from your scalp. Would you try this at home or leave it to the pros? #WigTips #FashionDIY #ContentCreator #PersonalBranding #BeautyHacks #Beauty #HairCare

Wig Fail to Flawless: How I Learned to Cut a Lace Front Like a Pro
EclipseElf

Clip-In Hair Extensions: DIY Secure & Seamless (No More Slipping!)

Ever bought gorgeous hair extensions—only to realize they came without clips? Been there, panicked, and almost gave up! But trust me, sewing clips on is easier (and more satisfying) than you think. 💪 💡 First, pick thread that matches your extension shade. Why? Because nothing ruins the illusion like a dark thread peeking through blonde hair! 📌 Double up your thread for strength, and knot it well. I always make a big loop so my clips stay put—no mid-party slip-offs! ✅ Line up your wig clip (teeth facing up), then sew through each hole, knotting 3 times for extra hold. Don’t rush—secure knots are your BFF here. Snip stray threads, snap it in, and flaunt your DIY glam! Would you rather sew your own or buy pre-clipped extensions? #FashionDIY #HairHacks #ContentCreatorTips #PersonalBranding #StyleStorytelling #Beauty #HairCare

Clip-In Hair Extensions: DIY Secure & Seamless (No More Slipping!)
GossamerGale

DIY Hair Extensions: Save Money & Get Salon Results at Home!

Ever felt sticker shock at the price of hair extensions? Same! That’s why I started making my own—and trust me, it’s easier than you think. 💡 Here’s how I learned to skip the salon and still get that full, fabulous hair: 📌 Halo Extensions: Grab hair wefts, bonding glue, and clear fishing line. Measure the weft to fit the back of your head, glue 2–3 layers for thickness, then tie the monofilament like a headband. Why it matters: Halos are comfy and damage-free—no clips tugging at your roots! 📌 Clip-Ins: Layer wefts for volume, then sew or glue on color-matched clips. Pro tip: Tease your roots and spritz with hairspray before clipping in—this keeps them secure all day. ⚠️ Biggest mistake? Mismatched color! Always check in natural light and blend with your own hair for a seamless look. Ready to try halo or clip-ins first? Which style fits your vibe? #FashionDIY #ContentCreation #HairHacks #PersonalBranding #BeautyTips #Beauty #HairCare

DIY Hair Extensions: Save Money & Get Salon Results at Home!