Tag Page Makeup

#Makeup
ericwagner

Visual Weight: Hollow Areas Add Balance

We often treat facial hollows—like tear troughs or eye bags—as flaws to erase. But these recessed areas subtly define facial balance and direct visual weight. For example, highlighting the mid-face without contouring the outer edges can backfire. It enlarges the central zone and weakens facial structure. This is why over-brightening can make the face look wider, not fresher. In makeup, light and shadow should mirror natural lighting logic—like in painting. When one area is brightened, other zones must respond with subtle shifts to maintain harmony. K-beauty’s dewy cheek highlighter is a perfect use of visual weight: it draws attention upward and outward, reinforcing cheekbone shape. Blush, brow depth, lip color, bangs, even hair wave direction—all shift perception. A strong eye look may call for softer lips. A vivid lip might need balanced hair or earrings. Effective makeup isn’t just color—it’s strategy. Focus where you want to lead the eye. #beauty #makeup #contouring

Visual Weight: Hollow Areas Add Balance
Rachel Martin

Why Aegyo-Sal Doesn’t Work for Everyone

When a beauty feature becomes a universal standard, it often loses nuance. Aegyo-sal—the puff under the eyes—was meant to soften the gaze, shorten the mid-face, and add youth. But not every eye benefits from exaggerating it. Here’s when it backfires: 1️⃣ Low orbital volume. If the brow-eye-cheekbone angle is wide, the eye area is flat. Adding puff here crowds the eye, making it dull. 2️⃣ Naturally thick orbicularis muscles. If your natural aegyo-sal is already prominent, drawing more can overwhelm the eye shape—especially with hooded lids or wide creases. 3️⃣ Uneven under-eye surface. If you have strong tear troughs or visible bags, you need a smooth canvas. Drawing volume here exaggerates texture, not charm. 4️⃣ Style mismatch. This look suits sweet or delicate aesthetics. For sharp or clean styles, it can feel artificial. There’s no rule that says you need to draw aegyo-sal. Start with your own structure—not social media formulas. #beauty #makeup #eyemakeup

Why Aegyo-Sal Doesn’t Work for Everyone
Elizabeth Phillips

NewJeans Artist’s Soft Wood-Tone Look

This muted wood-toned nude was recreated step-by-step from a NewJeans makeup artist known for preserving each member’s natural features. On Hanni, the look reads as plant-like: clean, luminous, and effortlessly modern. Prep begins with soaked toner pads and lip oil. A hydrating primer is spread with a spatula to avoid hand warmth altering texture. A sheer, moist cushion base is locked in with a bouncy sponge. Use skin-tone concealer palettes with slight undertone shifts to correct discoloration precisely. Set only where needed with translucent powder. Natural contour is key—choose a soft gradient product and layer subtly. Frame the face with wide, sweeping motions, and refine edges like the forehead and jaw with smaller brushes. Brows are detailed with neutral pencils and tinted gel. Eyes use a single milk-coffee matte across lids, aegyo-sal, and socket. Finish with brown liner, mascara, and a mousse tint on cheeks and lips in glassy, low-saturation layers. #beauty #makeup #nudemakeup

NewJeans Artist’s Soft Wood-Tone Look
beverlymills

Eyeshadow Finally Clicked When I Saw This

It took me five years to realize: you’re not just blending pigment—you’re sculpting a larger version of the eye itself. Many beginners apply eyeshadow like coloring a flat surface. But expert placement mimics real structure. Think about it: a well-defined socket line, a lifted outer edge, and an open inner corner all echo the expanded architecture of an ideal eye. That’s why seasoned artists leave space near the brow tail, why the darkest tones sit in the outer third, and why “invisible shapes” matter more than visible shimmer. Once you view eyeshadow as defining a dimensional silhouette—not just adding color—your technique shifts. This is also why Western looks emphasize the crease: depth enhances clarity. Brighten the inner corner, sculpt the outer V, and you’ve designed an eye that reads from across the room—without overpainting it. Once this clicks, you’re no longer guessing. You’re shaping. #beauty #makeup #eyeshadow

Eyeshadow Finally Clicked When I Saw This
Evonne

The Brow Bone Trick: 2 Overlooked Steps to Boost Dimension

Want sculpted, defined brows with a lifted brow bone effect? Two things make all the difference: brow-first sequencing and intentional blank space. Many makeup tutorials recommend doing eyeshadow first, claiming it helps “frame” the eye. That’s not wrong—but if you’re aiming for dimensional brows, it’s limiting. Here’s why: Without brows as a reference, the outer edge of your eye makeup drifts aimlessly. To anchor that structure, start with your brows—especially the tail. Once the tail is placed, you can extend your shadow naturally toward it, which instantly sharpens and lifts the entire eye socket. Second tip? Don’t overblend past the brow peak. Leave subtle space underneath the brow arch and behind the tail. This “controlled negative space” gives the illusion of lift and structure—no heavy contour needed. Want more drama? Highlight the brow bone, deepen the socket, and define the nose bridge. Your eyes will pop in all the right ways. #beauty #makeup #eyebrow

The Brow Bone Trick: 2 Overlooked Steps to Boost Dimension
Evonne

How I Finally Cracked My Makeup Style

It took me five years to realize: finding the right makeup look isn’t about copying tutorials. It’s about understanding lines and curves—and how tiny shifts in direction reshape the face. Take brows. Most have two parts, but change the angle, curve, or width slightly and the entire expression transforms. That same principle applies to eyeliner, lashes, contour, and blush. Each is just a line—draw it differently, and the mood changes. A straight eyeliner softens your look. Curve it, and suddenly there’s mystery. A fan of upward lashes looks lively; but let that final lash cluster droop slightly—like some actresses do—and you get that cool, distant elegance. It’s subtle but powerful. Blush is no exception: swipe it horizontally to widen, diagonally to elongate, or vertically for a natural lift. Don’t just follow steps—trace your own lines. #beauty #makeup #facialcontouring

How I Finally Cracked My Makeup Style
Hannah Phillips

Why Camera-Ready Makeup Needs More Punch

No filter. No edits. Just raw camera shots—and trust me, makeup needs to work harder on screen than in real life. If you have soft features, here’s the trick: 👉 Boost contrast across the face. Contour and highlight are essential—not harsh, but definitely present. The difference in light and shadow must read clearly, especially under natural lighting. 👉 Define your eye shape with sharp lines. Don’t rely on heavy eyeliner to make your eyes pop. A thin, precise line refines shape and adds focus without weighing the eyes down. 👉 Let lashes do the lifting. This is where you create volume and openness. The eyes should look bright and awake even without dramatic shadow. It’s not about wearing more—it’s about making every stroke count. The lens sees differently than the mirror. #beauty #makeup #oncamera

Why Camera-Ready Makeup Needs More Punch
Rachel Martin

5 Pro Tips for Authentic J-Beauty

Lately, I’ve upgraded my Japanese-inspired looks—and these 5 adjustments made all the difference. 1. Use enough styling wax and oil. Light application won’t cut it. Full coverage, especially on the bottom third of the hair and across bangs, gives that signature sleek “wet” texture. 2. Skip fake aegyo-sal shadows. Natural brightness under the eyes works better, unless you’re going for a kawaii, doll-like vibe. 3. Brows must be intentional. No soft fades. J-beauty brows are bold, clean-edged, and as defined as your eyeliner. 4. Round eyes? Stop overextending eyeliner. It disrupts the eye’s natural shape and can make them look smaller. Keep lines tight to preserve softness. 5. Match liner thickness to lid space. From center to outer corner, go slightly thicker—but stay under half your crease width. One-third is often the sweet spot. Details like these turn “inspired by Japan” into actually looks Japanese. #beauty #makeup #japanesestyle

5 Pro Tips for Authentic J-Beauty
Rachel Martin

Best Makeup Fixes for Soft Round Faces

After years of trial (and way too many selfies), I finally found a look that flatters soft, fuller faces—especially if you’re on the淡颜 spectrum. The biggest issue? Round faces tend to look “crowded,” making features seem smaller. The fix? Stretch the mid-face visually. That means elongating the space between your eyes and lips. Here’s how I do it: • Brows: Skip flat or thick shapes. Start from the upper edge and lift your arch slightly. A clean, angled brow adds height to the center of your face. • Eyeliner: Pull it out—not down. Straight or upward flicks give the illusion of vertical length. • Blush: Less is more. Leave space on the cheeks. Apply closer to the inner cheekbone for slimming effect. Bonus: Light lashes > thick ones for淡颜 girls. And always test your color tones—cool pinks and lilacs brighten my whole face. #beauty #makeup #roundface

Best Makeup Fixes for Soft Round Faces
Elizabeth Phillips

How I Use Spot-Setting to Add Glow

Flawless, luminous skin isn’t just for dry or perfect skin types—even oily or acne-prone skin can glow, if you set it right. 
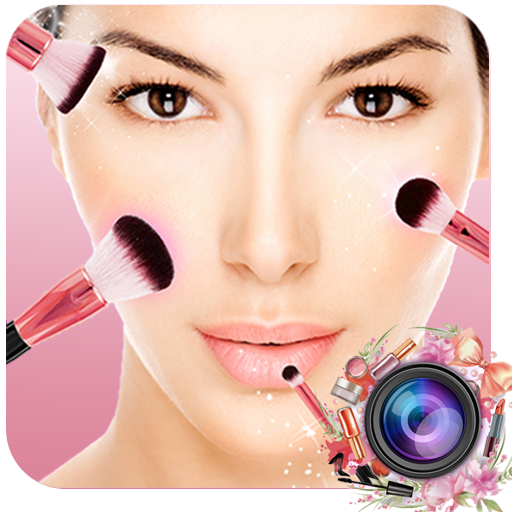
Instead of a full-face matte base (which often flattens real skin), I use targeted setting. The key? Keep the center polished and the edges airy. Start by lightly pressing powder under the eyes, around the nose, mouth corners, nose tip, and between the brows—areas prone to creasing, oil, or enlarged pores. Use a small puff or brush, and always tap, don’t drag. If you have blemishes or oil-prone zones (like cheeks near the nose), go for a sheer powder just to reduce shine. But never mattify the cheekbones. Let the light reflect naturally there—it’s what makes skin look alive. Forehead and chin? Leave them with a soft glow. This technique gives you camera-ready wear and real-life texture. No cakey mask. Just refined skin with dimension. #beauty #makeup #settingpowder

How I Use Spot-Setting to Add Glow