HorizonHalo+FollowDIY Kids’ Haircuts: From Panic to Pro (Without the Salon Drama!)Ever felt like your kid’s hair grows faster than you can book a salon appointment? 🙋♀️ I used to dread at-home trims—until I cracked the code! Here’s how to make DIY haircuts stress-free and even fun: 💡 Prep Like a Pro: Start with freshly washed, damp hair. Pop on their favorite movie and wrap a towel around their shoulders—trust me, it keeps the itchies (and squirming) to a minimum! 📌 Clippers for the Win: For super short cuts, agree on the length with your kid (show pics!). Go slow, start at the back, and remember: smaller guard = shorter hair. Fades? Use a longer guard on top, shorter on the sides, and blend in an upward arc. ✅ Scissors for Style: For longer looks, section hair and cut small pieces at a time, always using your fingers as a guide. Keep checking for evenness—stray long hairs love to hide! Snip with confidence and you’ll save money (and maybe even get a high-five). Would you rather try clippers or scissors first? #DIYHaircut #FashionParenting #ContentCreatorTips #PersonalBranding #StyleStorytelling #Beauty #HairCare00Share
InvisibleInkling+FollowDIY Triangle Bangs: Avoid the Lopsided ‘V’ Disaster!Ever tried cutting your own bangs and ended up with a crooked mess? 🙋♀️ Been there! Here’s how to nail those edgy triangle (aka ‘V’) bangs without the regret: 💡 Start by sectioning off just the right amount of hair—too much and you’ll look like you’re wearing a helmet, too little and the ‘V’ disappears. Use clips to keep the rest out of your way. 📌 Wet your bang section and comb it forward. Visualize your dream ‘V’—this is your blueprint! ⚠️ Snip slowly! Always cut less than you think you need. Begin at your temple, angle toward your nose, and repeat on the other side. Trust me, you can always trim more, but you can’t glue it back! ✅ Blow dry with a round brush, then fine-tune any strays. Want extra polish? A quick pass with a straightener or a spritz of hairspray keeps your ‘V’ sharp all day. Would you dare to DIY your bangs, or do you leave it to the pros? #FashionDIY #ContentCreation #PersonalBranding #HairHacks #StyleStorytelling #Beauty #HairCare00Share
VelvetVulture+FollowFlat Back Earrings Stuck? Here’s How I Finally Got Mine Out—No Tears!Ever spent way too long in front of the mirror, convinced your flat back earrings are now a permanent part of your ear? 😅 I’ve been there, and trust me, you’re not alone! Here’s what actually works: 💡 For screw-in flat backs: Gently grip the front (the cute part!) and the back post, then twist the front counterclockwise. If it’s reversed, try unscrewing the back instead—some brands love to keep us guessing! 📌 Push pin styles: Hold both ends and pull apart. If it’s stubborn, a gentle twist while pulling usually does the trick. ⚠️ If it’s stuck: Clean the area with rubbing alcohol, then massage a little petroleum jelly around the post. Latex gloves = instant grip boost! ✅ Still stuck? Don’t force it—your piercer is your best friend here. What’s your biggest earring struggle—removing them or not losing the backs? Let’s swap stories! #FashionHacks #EarringTips #ContentCreator #PersonalBranding #StyleStorytelling #Beauty00Share
DappledEclipse+FollowAre You Ruining Your Perfume Without Realizing It? Storage Secrets Revealed!Ever wondered why your signature scent just doesn’t last like it used to? I used to keep my prettiest bottles on my bathroom shelf—until I realized I was basically sabotaging them! 💡 Always store perfume away from sunlight and heat—think closet or drawer, not your steamy bathroom. Why? Sun and temperature swings break down those dreamy notes way too fast. 📌 Keep bottles in their original boxes or a cute decorative box for extra protection (plus, it feels luxe!). ✅ Always pop the cap back on tight and skip shaking the bottle—air is the enemy of fragrance! Trust me, these small tweaks make your favorite scents last so much longer. Where do you keep your perfumes—on display or tucked away? #FashionTips #PersonalBranding #ContentCreation #PerfumeCare #StyleStorytelling #Beauty #Makeup00Share
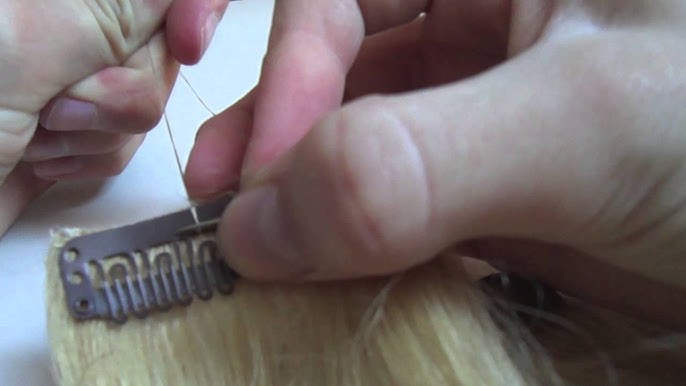
EclipseElf+FollowClip-In Hair Extensions: DIY Secure & Seamless (No More Slipping!)Ever bought gorgeous hair extensions—only to realize they came without clips? Been there, panicked, and almost gave up! But trust me, sewing clips on is easier (and more satisfying) than you think. 💪 💡 First, pick thread that matches your extension shade. Why? Because nothing ruins the illusion like a dark thread peeking through blonde hair! 📌 Double up your thread for strength, and knot it well. I always make a big loop so my clips stay put—no mid-party slip-offs! ✅ Line up your wig clip (teeth facing up), then sew through each hole, knotting 3 times for extra hold. Don’t rush—secure knots are your BFF here. Snip stray threads, snap it in, and flaunt your DIY glam! Would you rather sew your own or buy pre-clipped extensions? #FashionDIY #HairHacks #ContentCreatorTips #PersonalBranding #StyleStorytelling #Beauty #HairCare00Share
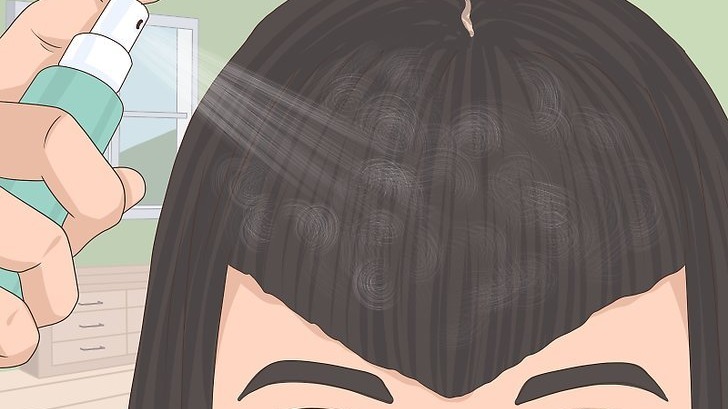
RippleRaccoon+FollowStruggling with Flat, Lifeless Hair? Here’s How to Nail Hair Wax Like a Pro!Ever had a hair day where your style just wouldn’t hold—no matter how much you tried? Been there! The secret weapon: hair wax. But trust me, it’s all about the technique. 💡 Start with dry or barely damp hair—wax on wet hair can kill your volume and make things look greasy fast. 📌 Scoop out just a pea-sized amount, warm it up between your fingers until it’s smooth, then work it through your hair, focusing on the tips for texture or the roots for volume. Less is more—too much wax is a one-way ticket to helmet hair! ✅ Want a messy, undone look? Tousle and twist random sections. For sharp bangs or a bold mustache, shape and set with your fingertips. The right wax routine transforms your style—what’s your biggest hair wax struggle: volume, texture, or control? #FashionTips #ContentCreation #PersonalBranding #HairCare #StyleStorytelling #Beauty40Share
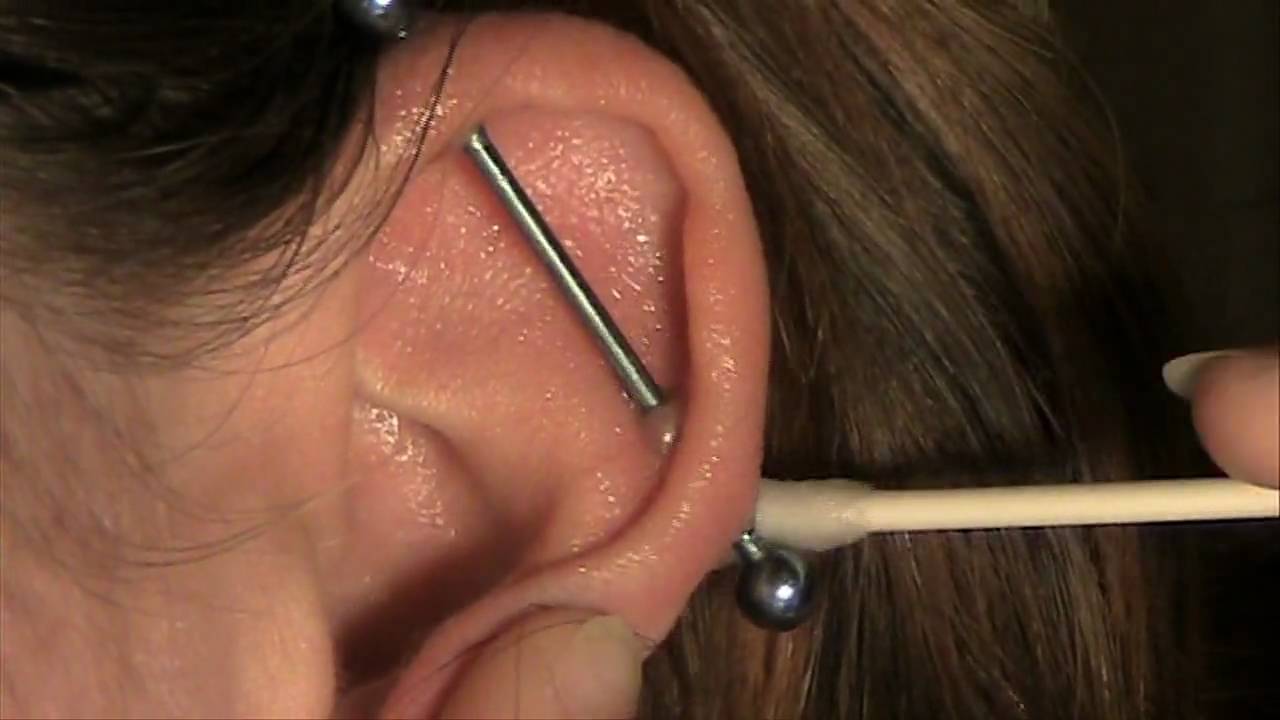
DazzlingDingo+FollowIndustrial Piercing Drama? Here’s How I Keep Mine Clean & Infection-Free!Confession: I almost lost my industrial piercing to a rookie cleaning mistake—ouch! If you’re rocking this edgy look, here’s how to keep it sparkling and safe: 💡 Warm water rinse first! Let the steam from your shower loosen up any crusties—no picking needed (trust me, it only makes things worse). 📌 Antibacterial soap is your BFF. Lather up, then gently twist the bar with your pinky for a full clean. Why? It gets behind the rod where gunk loves to hide! ✅ Sea salt soaks are a game-changer. Mix a teaspoon of sea salt in warm water, dip a cotton pad, and press for 5 minutes. It soothes and speeds up healing. ⚠️ Hands off unless you’ve washed up! Dirty fingers = infection risk, and nobody wants that drama. Stay consistent, and your piercing will thank you! What’s your go-to aftercare hack—soap or salt soaks? #FashionTips #PiercingCare #ContentCreator #PersonalBranding #StyleStorytelling #Beauty30Share
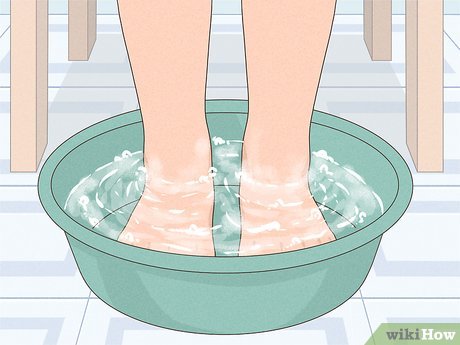
CharmingChime+FollowStained Feet from Summer Sandals? Here’s How I Get Them Baby-Soft Again!Ever stepped out of your favorite slides only to realize your feet look like you’ve been running through a coal mine? Been there! Here’s how I turn my stained soles back to smooth and clean in minutes: 💡 For light dirt, I lather up with a gentle body wash (Dove and Cetaphil are my go-tos) and scrub with a dedicated foot brush. Why? Because a quick scrub keeps skin soft and prevents stains from setting in! 📌 Got stubborn marks? I whip up a DIY scrub: 1 cup white sugar, 1/2 cup avocado oil, and a squeeze of lemon. The sugar buffs, the oil hydrates, and lemon zaps odors. Massage onto wet feet, scrub, rinse, and—voilà—fresh feet! ✅ Don’t forget to dry thoroughly and moisturize (but skip between the toes to avoid fungus!). What’s your go-to foot fix after a long day out—scrub or soak? #FashionHacks #ContentCreatorTips #PersonalBranding #StyleStorytelling #Beauty #Skincare81Share