Tag Page makeup

#makeup
Hannah Phillips

From 100 Blushes to Just 4—Here’s What I Actually Use

Do you have a whole drawer full of blush but only reach for a handful? Same. I love blush but also love being practical—so I trimmed my collection down to the essentials. Here are my 3 rules for picking blushes that won’t gather dust: ✅ Create different vibes (work-ready vs. playful) ✅ Shape your face (plump cheeks or slim down) ✅ Match your go-to lip colors (because clashing sucks) So, my final 4 blushes: 1️⃣ Workday Classic: Honey tea tones—subtle, soft, perfect for polished everyday looks. Swipe from cheek to eye corner to lift your features. 2️⃣ & 3️⃣ Youth Boost: One plumping pink and one contouring pink. Pop the plumper on apples, blend the contour shade along the edges for dimension. 4️⃣ Fall & Winter Mood: Blood-red blush. Perfect with dark lips and cozy coats. Dot lightly on cheeks and blend outward for a natural flush. Less clutter, more coordination, and no wasted money. Quality over quantity wins every time. #beauty #makeup #blush

From 100 Blushes to Just 4—Here’s What I Actually Use
Hannah Phillips

4 Blush Placements That Change Everything

People always ask, “What blush are you wearing?” But the real game-changer? How you wear it. Here are 4 foolproof ways to place your blush—and what they do: 1. Baby Cheek (Center Pop) Use fresh pink or peachy pink shades. It’s soft, safe, and works on everyone. Think no-makeup makeup vibes. 2. Drunk Blush (Under-Eye) Use milky lilac or cool-tone pinks. Creates that “flushed after wine” glow. Great for selfies, festivals, or long midfaces. 3. French Flush (Diagonal Sweep) Try muted rose or dusty mauve. It sculpts the cheekbones and brings elegance—especially for fuller or square faces. 4. Sweet Horizontal (Across Nose + Cheeks) Use melon or muted apricot. This one shortens the midface visually and gives major Korean “blush blur” energy. I’ve been loving INTO YOU’s air-whipped blushes—super blendable, not too pigmented, perfect for practice. #beauty #makeup #blush

4 Blush Placements That Change Everything
Rachel Martin

Why Your Makeup Still Doesn’t Slay (Yet)

Real talk: Good makeup isn’t about copying influencers. It’s: Style → Skill → Stuff. In that order. You love your fave celeb’s winged liner, bold lip, and lifted brows—but if you’ve got a long diamond-shaped face, and she’s soft round with baby cheeks, you’re not gonna get the same effect. And that’s okay! Here’s what to fix: Stop chasing products. Start learning what flatters your features. A flawless “copycat beat” on the wrong face just highlights the wrong things. Harsh but true. 👉 Pro tip? Book a $100+ makeup session with an artist whose vibe you love (not wedding glam, pls). Watch closely, record it, ask questions. Then recreate it. Over and over. If you’re broke (hi, student life), watch pro tutorials for your face shape—not filtered TikToks. ✨ And remember: You don’t need 72 products. Just a smart handful that work hard for you. Long game > one-time slay. That’s the glow-up nobody tells you about. #beauty #makeup #makeupmistakes

Why Your Makeup Still Doesn’t Slay (Yet)
Rachel Martin

Makeup Tips That Actually Make Sense

Some makeup advice that’s saved my face—and my time: 1️⃣ Your base doesn’t need to erase your skin. Want that “expensive skin” look? Aim for thin and even—not full coverage. Use multi-color concealer palettes to cancel tones (orange for dark circles, green for redness). A few imperfections make your skin look real. 2️⃣ Pick a focus. You don’t need snatched eyes, bold lips, flushed cheeks, and glass skin in one go. Choose one feature to spotlight. The rest? Chill. 3️⃣ Contour isn’t one flat shadow. Use two shades—one soft for structure, one deeper for precise carving. The darker the shade, the smaller the brush. 4️⃣ Highlight beats contour any day. Layer a cream highlighter under powder for that believable glow. Don’t just add shadow—add light. 5️⃣ Still not vibing? Get a second opinion. Sometimes your mirror lies. A good hair stylist (yes, even your Tony) can fix your whole aesthetic. 6️⃣ And honestly? Makeup is optional. Use it, don’t use it. It’s just another tool—not a requirement. #beauty #makeup #minimalmakeup

Makeup Tips That Actually Make Sense
Elizabeth Phillips

Makeup Isn’t Copy-Paste. It’s a System.

The first time I learned contouring, the tutorial basically said: “Put brown here, white there. Done.” No explanation, no logic. Just: monkey see, monkey blend. And honestly? That’s how most makeup tutorials are—fragments with zero context. It’s not teaching. It’s replicating. Great if you're trying to look like someone else. Useless if you actually want to understand why makeup works. Here’s the thing: before I touch a brush, I map the concept. What’s the goal? To mimic light and shadow. Want to understand highlighting? Go stand under a spotlight. Notice what reflects: the nose bridge, cheekbones, brow bone, cupid’s bow. That’s highlight—not magic, just physics. Shadow falls where the light doesn't: under your cheekbones, sides of the nose, jawline. That’s contour. Eyeshadow? More shadow. Blush? Warmth where blood would naturally flow. Contouring isn't about faking someone else's face. It's about knowing your own—and manipulating contrast to bring your structure closer to harmony. So yeah. Stop painting by numbers. Start seeing your face like a sculptor does light. #beauty #makeup #contourtips

Makeup Isn’t Copy-Paste. It’s a System.
Elizabeth Phillips

Stop Overthinking Blush Placement

Blush was never meant to be this complicated. Originally, it’s just there to mimic blood flow—aka, make you look alive. But somewhere along the way, we started treating it like a contouring tool, a face shaper, a cheekbone elevator. Truth is, natural flushing doesn’t follow rules. Have you ever looked at your face when you're cold, nervous, laughing, or tipsy? The red shows up everywhere—under your eyes, across your nose, along your jawline, even on your ears. It’s inconsistent, messy, and—ironically—more beautiful that way. So yeah, go ahead and dab blush on your chin, your temples, wherever you feel you need a bit of warmth. Forget the rigid “C-shape for lift” or “high and tight for youth” tutorials. 
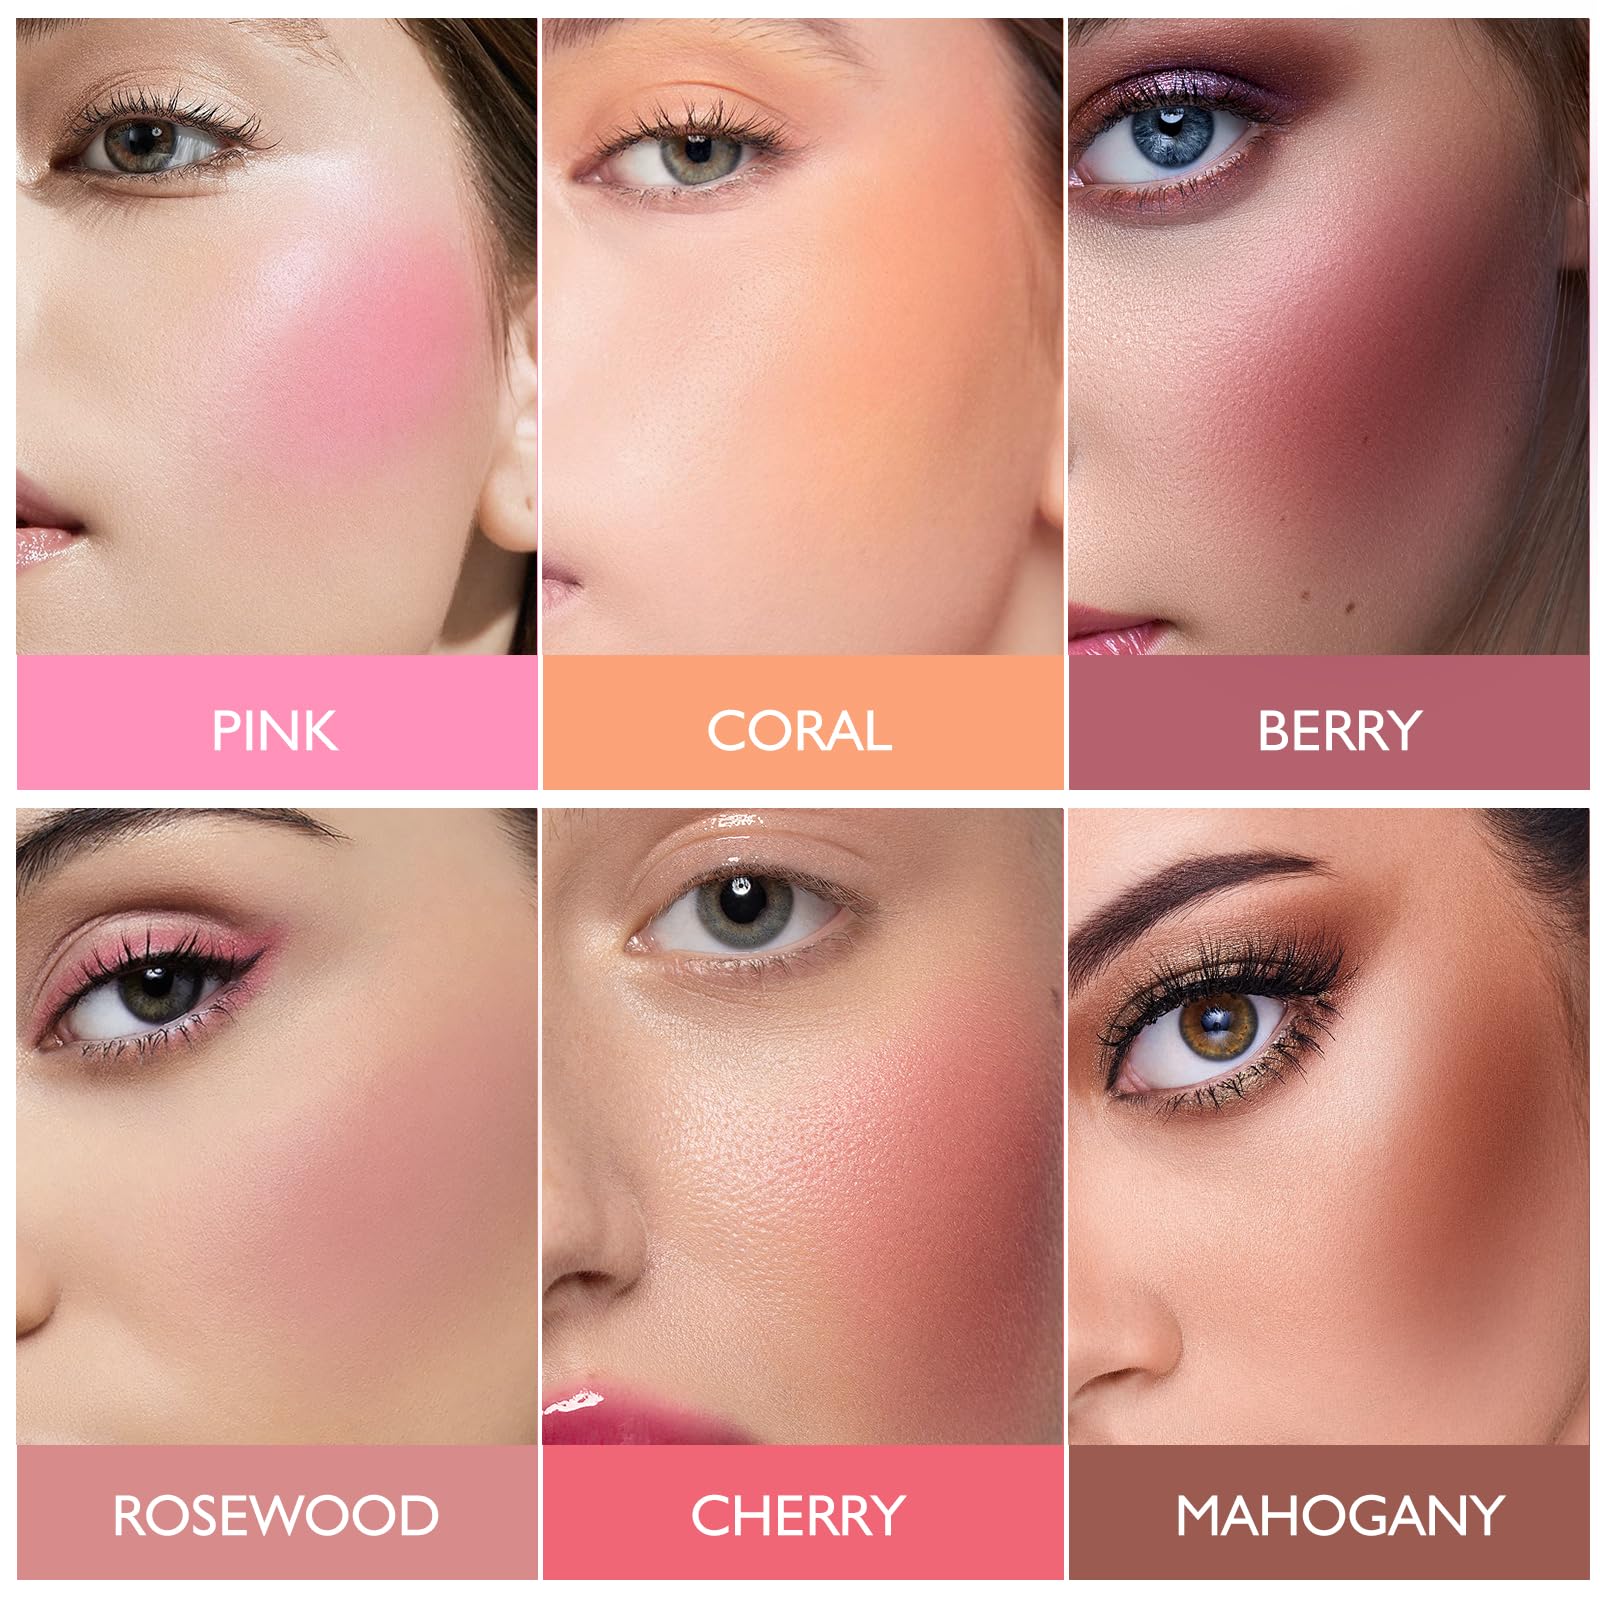
Instead of stressing about precision, focus on texture and blending. Pick a tone that melts into your skin and apply with a light hand. No blocks, no borders—just glow. Uniform blush rules make unique faces look the same. That’s not makeup. That’s erasure. #beauty #makeup #blush

Stop Overthinking Blush Placement
beverlymills

What Korean Bridal Makeup Actually Looks Like

After binging a dozen Korean makeup studio videos, I think I finally get it—this bridal look is peak K-beauty elegance. No heavy layers, no Insta-glam excess—just timeless, breathable beauty. 💫 Base: Ultra-sheer foundation brushed on thinly, likely Wakemake. No full-face powder—just sponge-tapped cream blush (probably fwee or Lilybyred) right into the center. Set only the T-zone and forehead lightly. 👁 Eyes: Set lids with translucent powder + a hint of apricot shadow. Shadows stay super subtle—think CLIO or Dasique tones. Most pigment goes under the eyes, especially the triangle zone. Inner corner shimmer = soft pink + champagne, not stark white. 🖊 Liner & Lashes: Brown gel liner, softly smoked out with shadow. Only the upper lash line is defined; bottom liner barely touches the inner corner. Lashes? Short clusters. Think bridal, not idol. 💋 Lips & Brows: No overlined lips here. Just a diffused cupid’s bow, soft rosy tint. Brows are natural, brushed up, nothing overly drawn. ✨ Water-glow skin? Achieved with: no powder + setting spray. #beauty #makeup #bridal

What Korean Bridal Makeup Actually Looks Like
beverlymills

Blush Placement Rules I Wish I Knew Sooner

I did makeup for years before realizing I’d been applying blush all wrong. Here’s what actually works: 🎯 Where to place it: • Find your cheekbone’s highest point—now move 1cm inward. That’s your center. • Don’t go below your nostrils. It drags the face down. • Never pass the inner edge of your pupil when looking straight. Keeps it lifted and balanced. 📐 Blush direction matters: • Short face? Sweep upward (diagonal). • Long face? Go horizontal for balance. 🎨 Best tools? Use a small brush, tap powder on half the bristle edge. For cream blush, fingers work great—dab in, build slowly. Always blend the edges. 💡Tip for beginners: go for "mood colors"—rosy or peach tones that add softness without overwhelming the face. Trust me, placement > pigment. #beauty #makeup #blush

Blush Placement Rules I Wish I Knew Sooner
Evonne

Are You Using Concealer All Wrong?

Let’s be real—dark lids, redness, uneven tone… concealer should fix it, but only if you use it right. Here’s the pro breakdown: • Dark purple/blue under eyes? Use a salmon-toned corrector. Warm peach cancels cool shadows—dab lightly, blend in layers. • Redness around nose or cheeks? Tap green corrector just where needed. Not all over—unless you want to look grey. • Smile lines or marionette shadows? Use a brightening beige shade to lift. • Acne or scars? Go one shade deeper than your skin, tap to cover, then diffuse the edges. Once concealer’s set, use a damp (almost dry) sponge to gently tap in foundation from the center out—never rub. For medium-deep skin tones, a sheer glow-finish base keeps you looking fresh, not flat. Bonus tip: color correction means you can rock pink eyeshadow, even on dark lids. It’s all about neutralizing first. #beauty #makeup #concealer

Are You Using Concealer All Wrong?
Evonne

How to Stop Foundation from Lifting Concealer

If your foundation keeps eating your concealer, try this game-changing order: Concealer → Setting powder → Foundation. Sounds backwards? It works—if you do it right. The real thief is your sponge. When it picks up foundation or powder unevenly, it drags off your carefully placed concealer. Solution? Make sure both products fully coat your sponge before tapping it onto your skin. This way, your tools touch the concealer indirectly, through product—not bare sponge. Another key: tap, don’t drag. Press foundation in gently, no rubbing. Heads-up: this method can slightly mattify your base. Setting spray works too, but you’ll need patience—it has to dry completely before you layer anything on top, or your base might lift or go patchy. Takes practice, but once you get it? No more vanishing concealer. #beauty #makeup #concealer

How to Stop Foundation from Lifting Concealer