Tag Page DIYprojects

#DIYprojects
Brianna Patel

At a Garage Sale. Trying to figure out what it is before I turn it into a coffee table base.

I found this really old, wooden item at a garage sale the other day. It's about five feet long, and the guy who owned it (who used to run an antique store) had no idea what it was either. It's got two metal thread plates on each side, which makes me think it might have been attached to something. My first guess was maybe some kind of old trough with eyelets to tie animals to, but that just doesn't feel right. Before I turn this into an coffee table base (that's my current plan) I'm genuinely so curious about its original purpose. Has anyone seen anything like this before? Any old farm equipment experts or antique gurus out there who can shed some light? #HelpNeeded #WhatIsIt #Woodworking #OldStuff #DIYProjects

At a Garage Sale. Trying to figure out what it is before I turn it into a coffee table base.At a Garage Sale. Trying to figure out what it is before I turn it into a coffee table base.At a Garage Sale. Trying to figure out what it is before I turn it into a coffee table base.
Thomas Clark

(p2 result) DIY retaining wall, all by myself, $6000, 4 weekends 😎 full build process

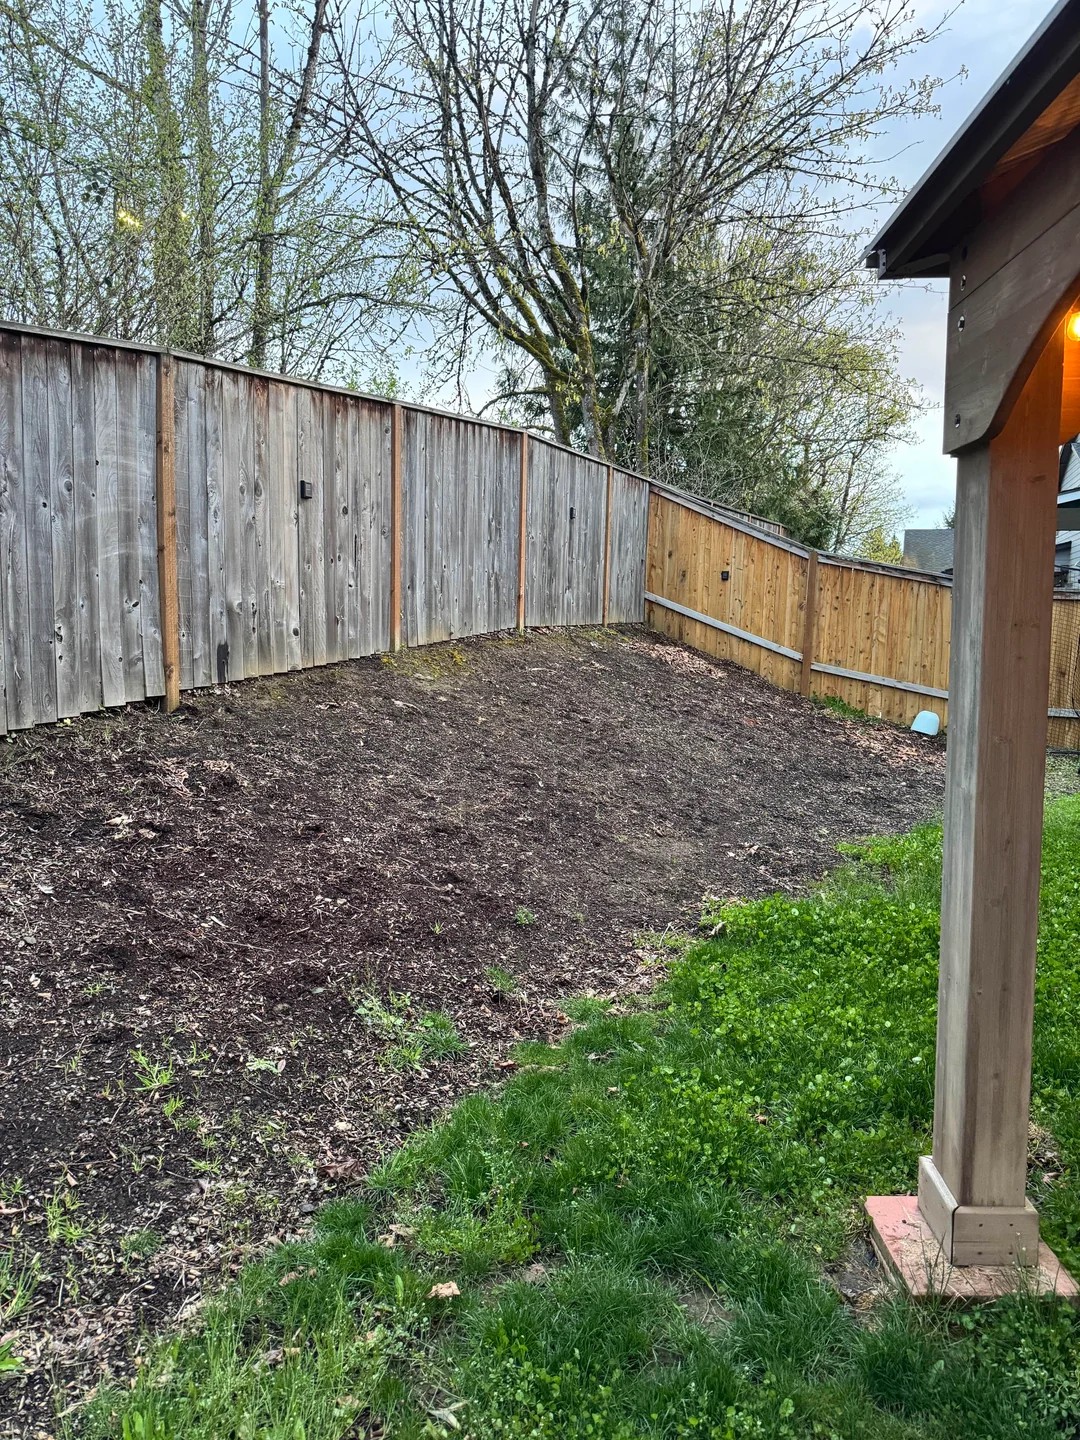
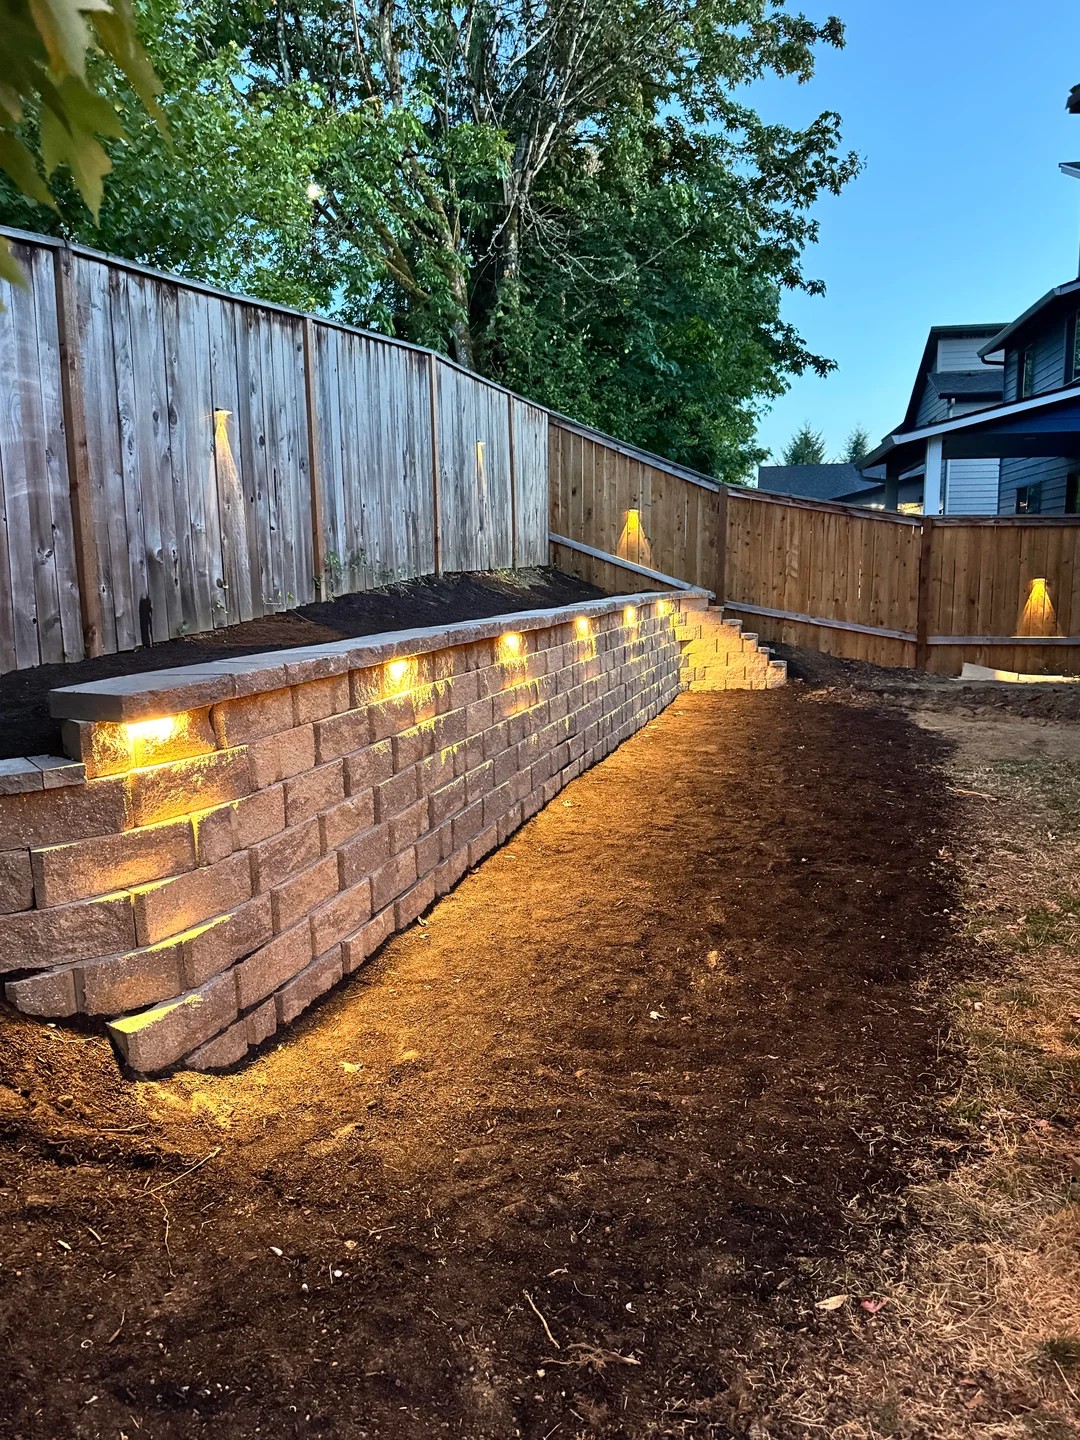
This summer I finally tackled my first big retaining wall project😎 We needed a 35-foot-long wall to level out our sloped backyard, fix drainage issues, and make the space actually usable (and look way better). I chose engineered concrete blocks. They're super heavy, interlock really well, and I found them at a good price locally. For drainage and support, I used a mix of clean rock and compactable fill dirt. I also added six low-voltage cap lights on top, wired to a dusk-to-dawn timer, for both function and a nice look. I rented a skid steer for the heavy digging and hauling, and picked up a few new tools I didn't have yet, like an angle grinder and a reciprocating saw. Here is my build process: First, I measured and marked the wall line, making sure to account for the slope. Then, the skid steer did the major digging, and I finished the trench by hand. 
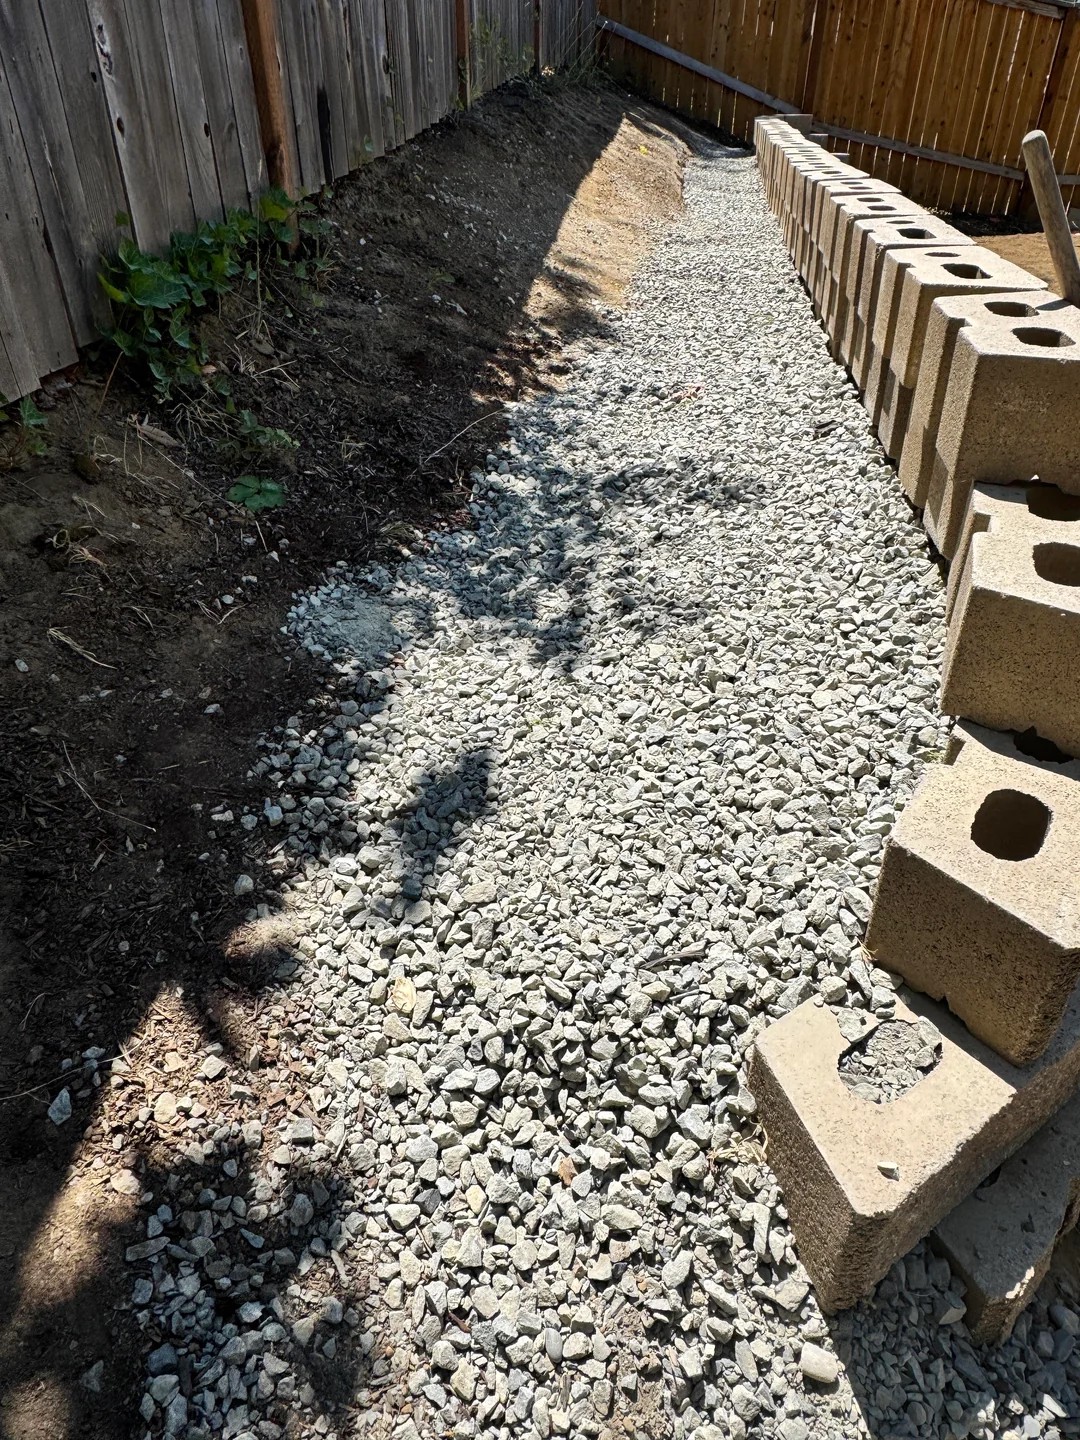
And I filled the trench with compacted gravel and obsessively checked the level. Getting this first layer perfect is everything! 
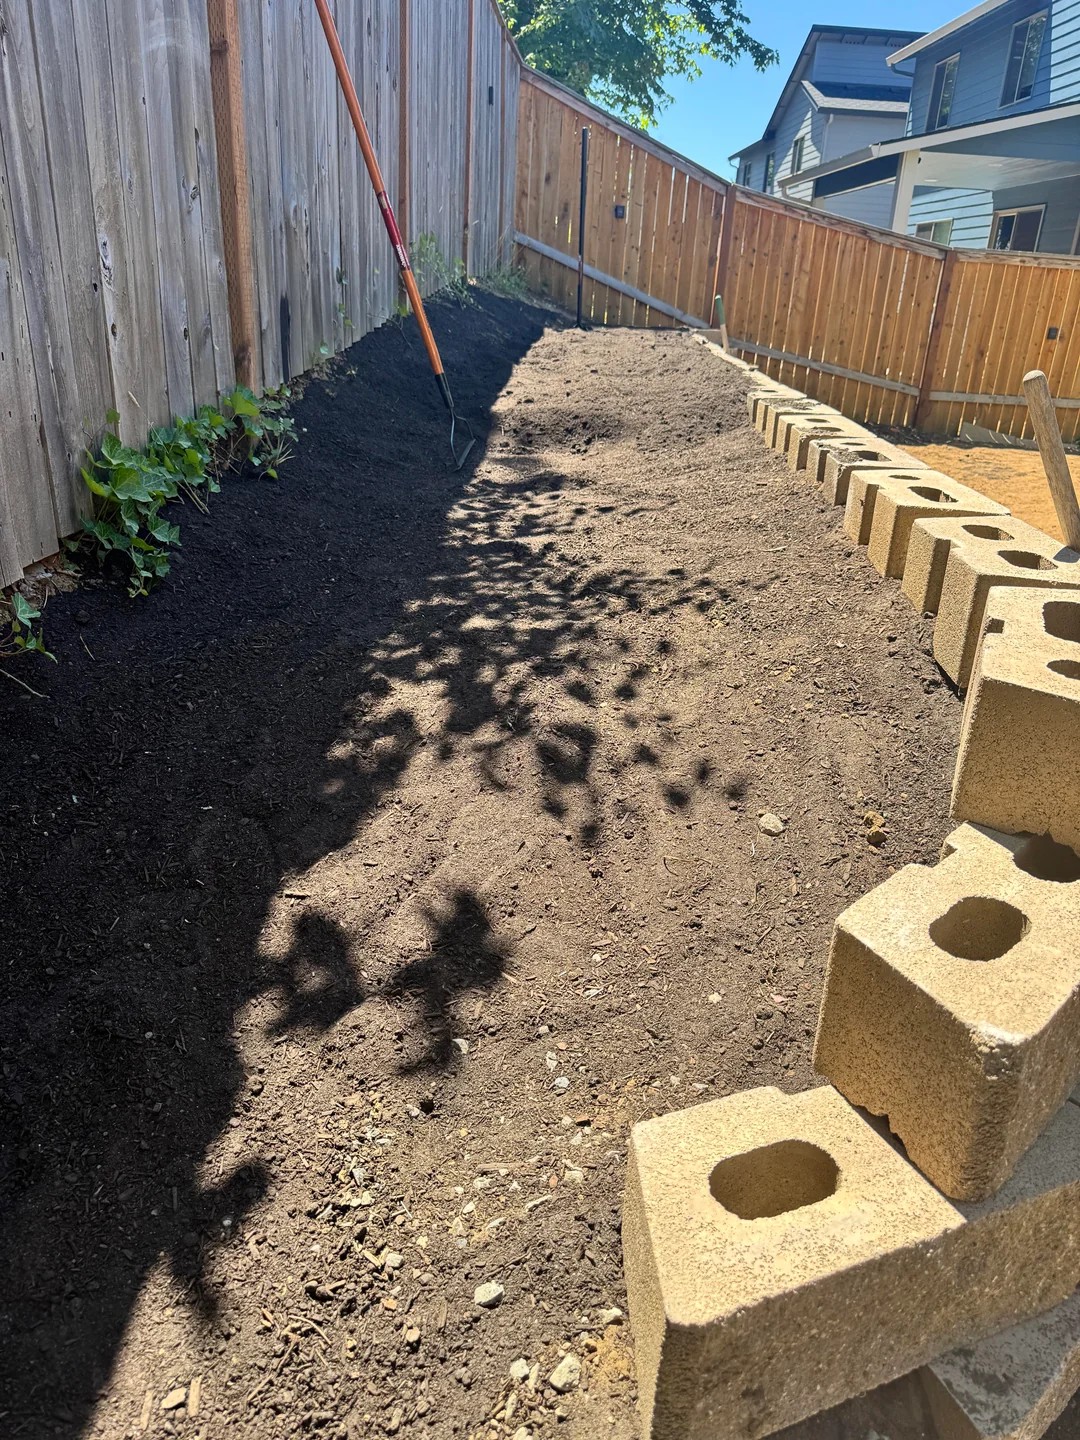
I stacked the wall blocks layer by layer, backfilling and compacting the dirt as I went. And I installed a French drain behind the wall with perforated pipe and clean rock. My one rookie mistake here was not using drain fabric... At last, to add the lights, I drilled holes for the conduit and ran all the low-voltage wiring before placing the very last row of blocks. The budget list: skid steer rental + delivery $750 wall blocks $3500 backfill materials $1000 lighting system (lights, transformer, wiring) $350 tools + equipment (new purchases only) $450 total so far $6050 
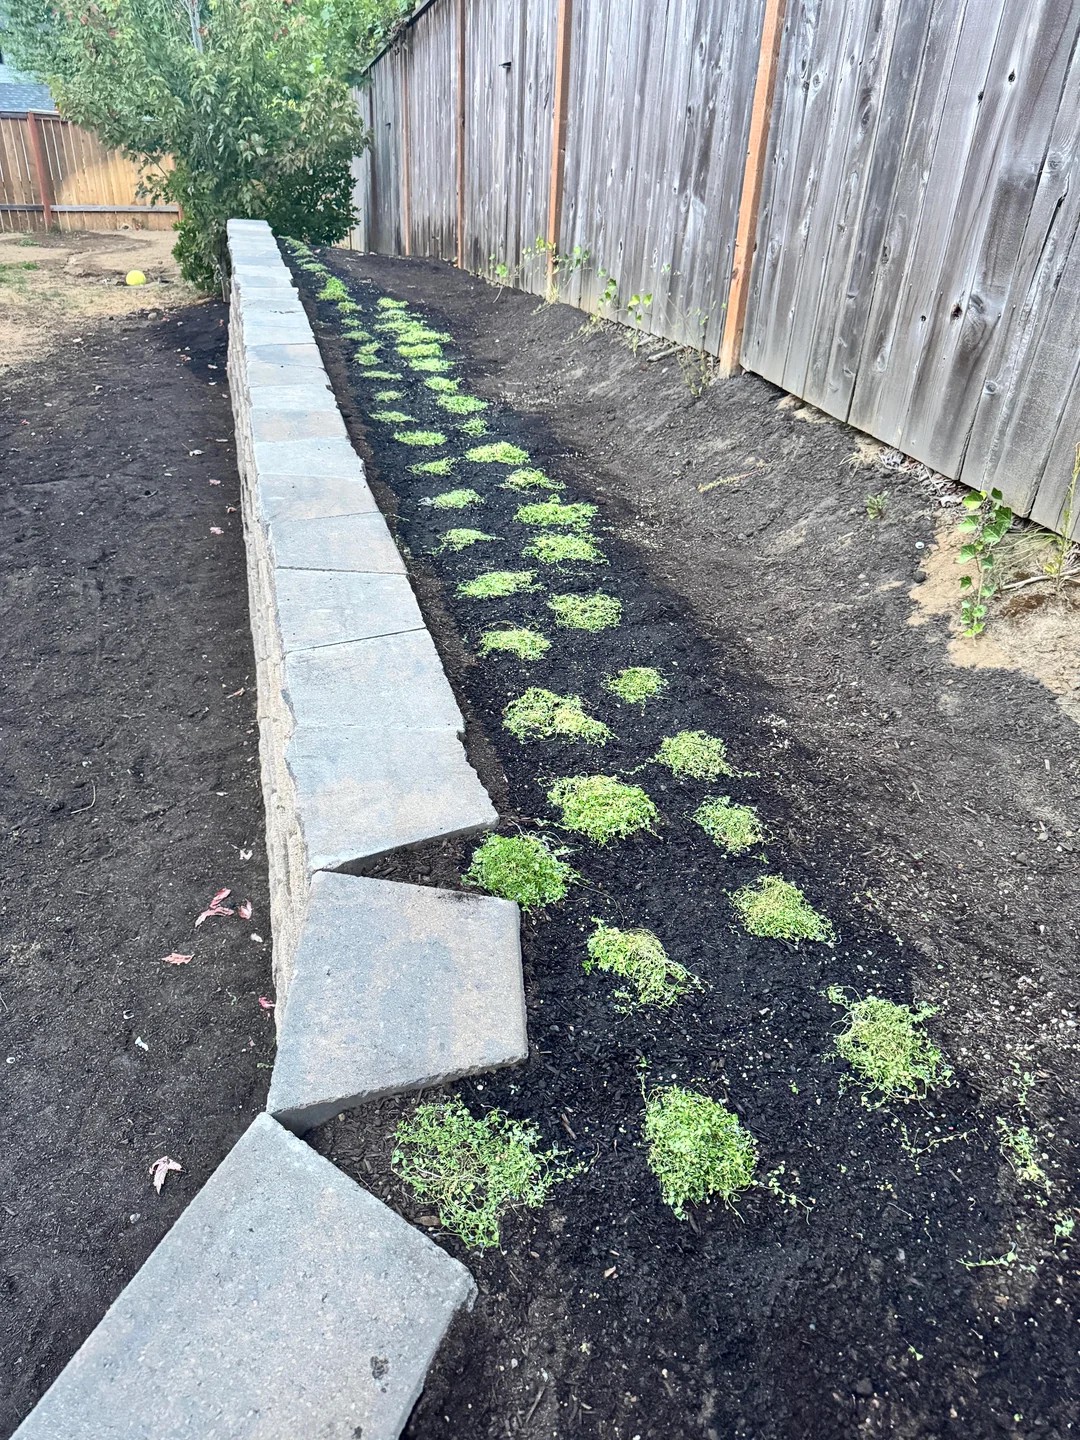
The whole project took me about 3–4 weekends, plus some evenings for planning and detail work. Still some finishing touches needed, but stoked with the progress 😎😎😎 #DIYProjects #HomeImprovement #Landscaping #BeforeAndAfter #HomeownerLife #Home #RetainingWallRenovation

(p2 result) DIY retaining wall, all by myself, $6000, 4 weekends 😎 full build process(p2 result) DIY retaining wall, all by myself, $6000, 4 weekends 😎 full build process(p2 result) DIY retaining wall, all by myself, $6000, 4 weekends 😎 full build process(p2 result) DIY retaining wall, all by myself, $6000, 4 weekends 😎 full build process(p2 result) DIY retaining wall, all by myself, $6000, 4 weekends 😎 full build process(p2 result) DIY retaining wall, all by myself, $6000, 4 weekends 😎 full build process
David Hernandez

Wooden cigarette box? Can it get any cooler? 🤯

Just saw it and got stunned!! And asked for the making steps, like below: 🗃️To make wooden cigarette box steps: 1️⃣Layer & Prep: Press three veneer layers with wood glue; let dry. (Apply burn marks before cutting if desired). 2️⃣Cut & Shape: Cut the layered veneer into squares, then glue these into the box shape. 3️⃣Refine: Use a thin saw for final cuts on the box. 🚬To make wooden "cigarette" steps: 1️⃣Prep Sticks: Cut thin sticks, add edging to ends. 2️⃣Wrap: Soak veneer, wrap around sticks, secure with tape. 3️⃣Finish: Once dry, trim veneer to fit and glue onto sticks. Definitely gonna try it! How about you? #DiyProjects #Woodworking #Handmade #CraftIdeas #CreativeDIY #DIYInspiration #CustomMade #WoodArt #CigaretteBox #UniqueGifts

Wooden cigarette box? Can it get any cooler? 🤯Wooden cigarette box? Can it get any cooler? 🤯Wooden cigarette box? Can it get any cooler? 🤯
SingingMockingbird

I Built a Cozy Cat Shelter for Strays

Ever spotted a shivering stray cat and felt that pang of guilt? Same. So, I decided to make a DIY insulated cat house, and honestly, it’s easier than assembling IKEA furniture. Grab two plastic storage bins (one big, one smaller), some styrofoam, and straw. Cut a cat-sized door in both bins, line the big one with styrofoam (floor, walls, and lid), then nest the smaller bin inside. Add more insulation, pop on the lid, and weigh it down so it doesn’t blow away. Set it somewhere quiet, off the ground (cinder blocks work), and fill it with straw (not blankets—trust me, wet blankets = cold cats). Toss in a toy, sprinkle some catnip, and leave food inside. Water goes outside, unless you want a soggy disaster. Now, every time I see a cat curled up inside, I feel like a tiny hero. 10/10 would recommend for instant karma and warm fuzzies. #CatRescue #DIYProjects #PetCare #Pets #Cats

I Built a Cozy Cat Shelter for Strays
BubblyBuccaneer

DIY Cat Shelters: Saving Strays in Style

Ever watched a street cat try to nap in a snowbank? Yeah, me too. So, here’s how I became the neighborhood’s unofficial cat architect. Grab a plastic storage bin (or, if you’re feeling fancy, some scrap wood). Cut two small doors—cats like escape routes, because raccoons exist. Insulate with foam or Mylar, but skip the blankets unless you want to make a feline icebox. Straw is the gold standard. Raise the shelter off the ground, unless you want to host a flood party. For indoor cats, cardboard boxes are basically cat mansions. Stack them, cut some doors, and toss in a toy. Don’t put food or water inside unless you want a soggy mess. Bonus points for adding catnip. Building a cat house isn’t just about being a good human—it’s about giving a little warmth (and dignity) to the fluffballs who never asked for winter. #CatRescue #DIYProjects #PetCare #Pets #Cats

DIY Cat Shelters: Saving Strays in Style
Tag: DIYprojects | zests.ai