Nancy Finds+FollowSecrets Grocers Wish You Didn’t Know… Seriously?!Ever noticed how the freshest produce is always at the front? Stores rotate stock so older items get sold first, and those perfect apples on top might not be the best pick. Dig a little deeper for the freshest batch. Also, those 'freshly baked' bread loaves? Many are shipped frozen and just finished in-store. Grocery shopping is more strategic than it looks—knowing these tricks can help you get better quality for your money. #Food knowledge #GroceryHacks #KitchenTips23399Share
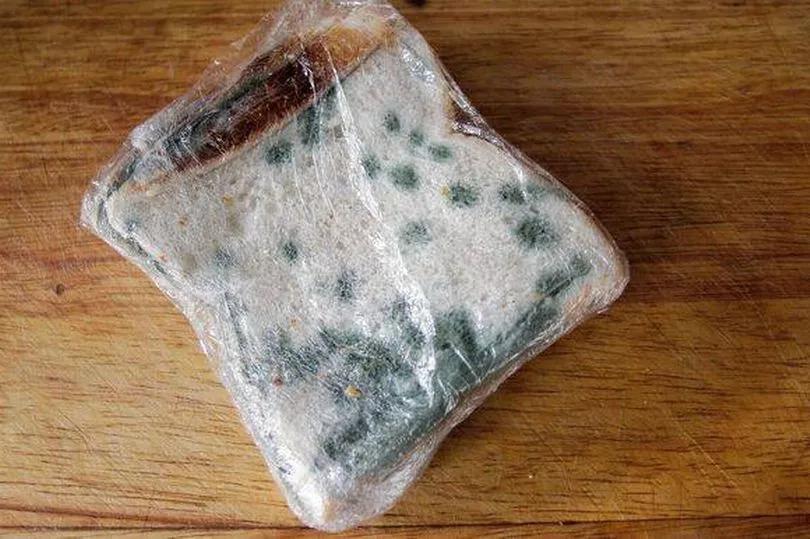
dianefrank+FollowThe Secret Spot to Keep Bread Mold-FreeTurns out, we’ve all been storing bread wrong! If you want your loaf to last up to 2 weeks without turning into a science experiment, stash it in the fridge—not on the counter or near appliances. Heat and moisture from things like the dishwasher or fruit bowl are mold’s BFFs. For sandwich bread, use a loosely closed plastic bag; for brioche, go for a paper bag. Bonus tip: warm it in the oven before eating for bakery-fresh vibes! #Food #BreadHack #KitchenTips11Share
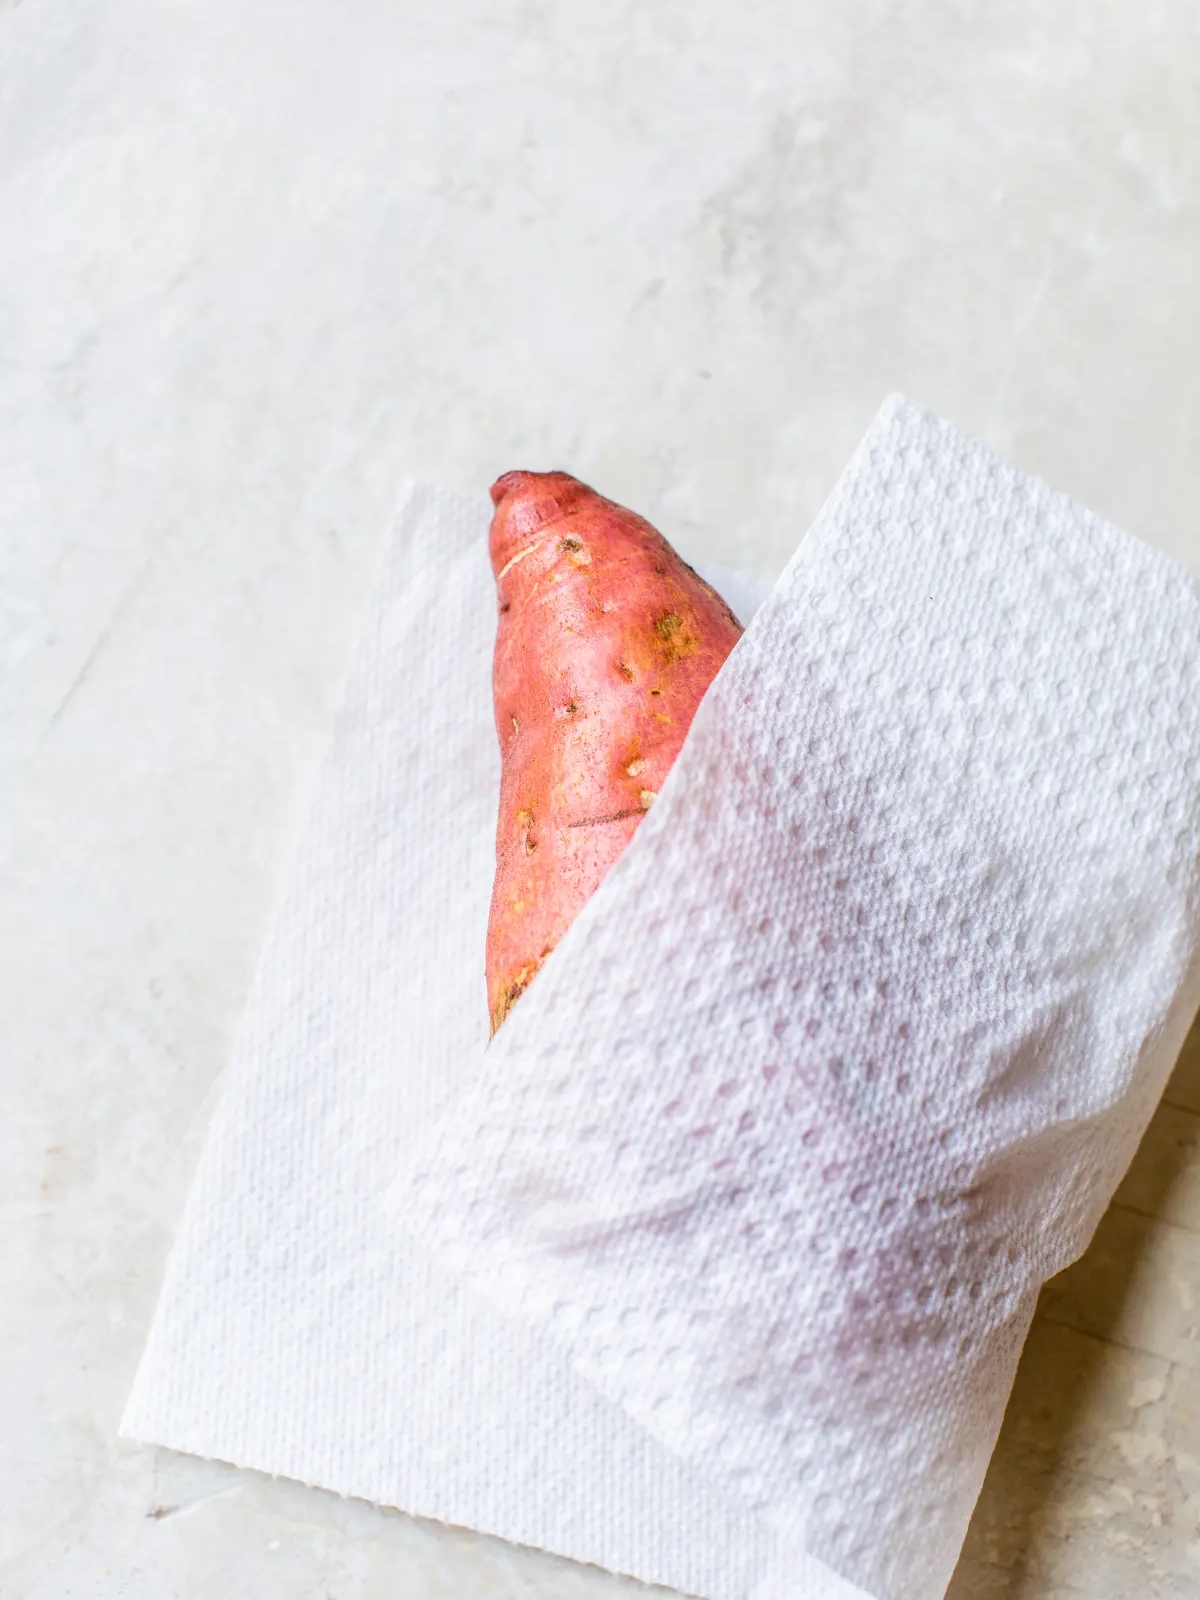
Mrs. Andrea Ayala+FollowHow to Microwave a Sweet Potato🥔 How to Microwave a Sweet Potato 🥔 Fact: Microwaving a sweet potato is the EASIEST way to cook it. It only takes 5-7 minutes and has been a go-to method for many people. Ingredients: - Sweet potato - small/medium - Butter/ghee/olive oil - Salt and pepper Step-by-step instructions: 1️⃣ Wash the potato: Rinse the potato under water and use a potato scrubber or vegetable brush to remove any dirt. If you don't have one, a paper towel or your hands will do. 2️⃣ Poke holes with a fork: Use a fork to poke 15-20 holes on the outside of the potato, piercing it. 3️⃣ Microwave: Place the potato on a microwave-safe plate and microwave it for 5 minutes. 4️⃣ Slice the potato: Let the potato cool for 1-2 minutes, then use a sharp knife to slice it down the center. If you're eating it as-is, add your desired toppings. If you're using it for a recipe, wait another minute or two before scooping out the flesh. That's it! Enjoy your perfectly cooked sweet potato in no time. #sweetpotato #cookingtips #microwaverecipe #quickandeasy #foodhacks #recipeideas #kitchentips #healthycooking #experimentinthekitchen #homecooking410Share
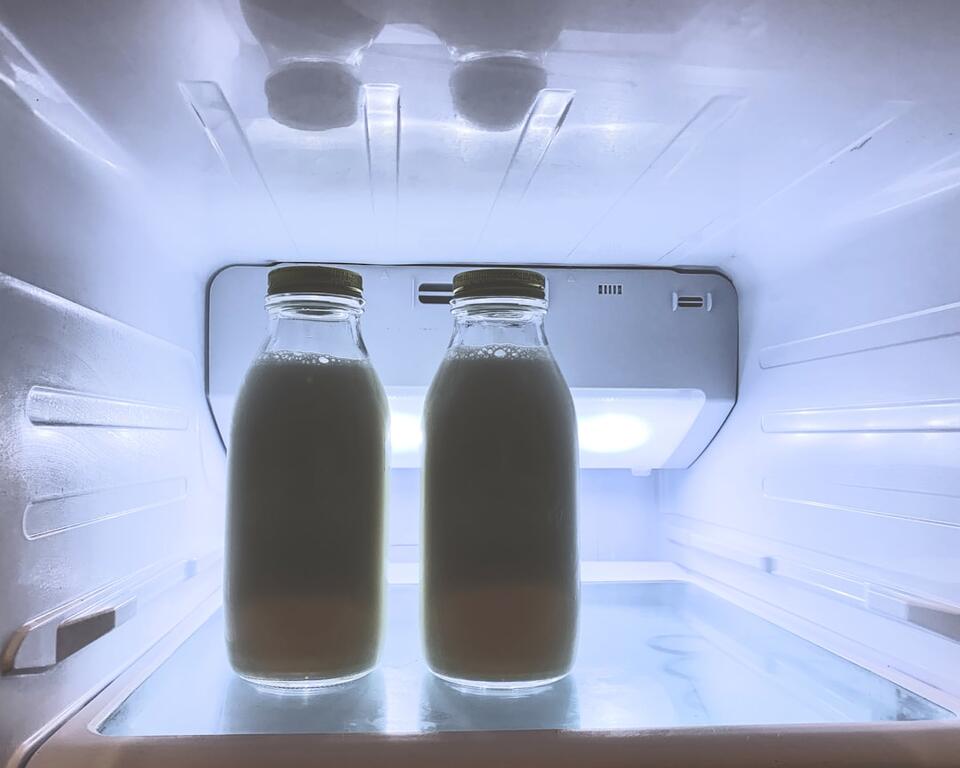
Joel Sweeney+FollowDairy Expiry Dates Lie—Trust Your Nose!Did you know your milk can go bad days before the date on the carton? Same goes for cottage cheese, yogurt, cream cheese, buttermilk, and ricotta—they’re all sneaky about spoiling early, especially if you store them in the fridge door or leave them out too long. Expiry dates are more about quality than safety, so use your senses: sniff, look, and (if you dare) taste. Don’t risk it—funky dairy can lead to some serious regret! #DairyDisaster #FoodHacks #KitchenTips #Health #BodyHealth30Share
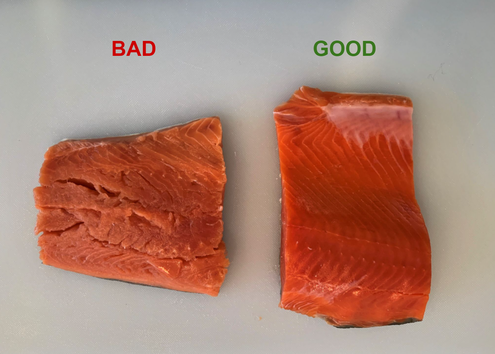
FuzzyQuartz+FollowFresh Fish or Toss It? Spotting Spoilage Before Cooking 🐟Pulled a filet out of the fridge last night, and it looked a bit off. Checked the sell-by date—was already two days past. The fish felt slimy and had a strong smell, so I didn’t risk it. It’s not worth getting sick. Usually, I freeze fish if I’m not cooking it right away. When prepping salmon, I look for those white lines and make sure the flesh is firm. If it’s mushy or has weird spots, it goes straight in the trash. For cooked fish, I keep it in an airtight container and eat it within three days. Freezer burn isn’t great either—makes the texture weird. Always clean up the area after tossing spoiled fish. It’s just safer that way. #FishSafety #KitchenTips #SeafoodStorage #Food #Cooking00Share
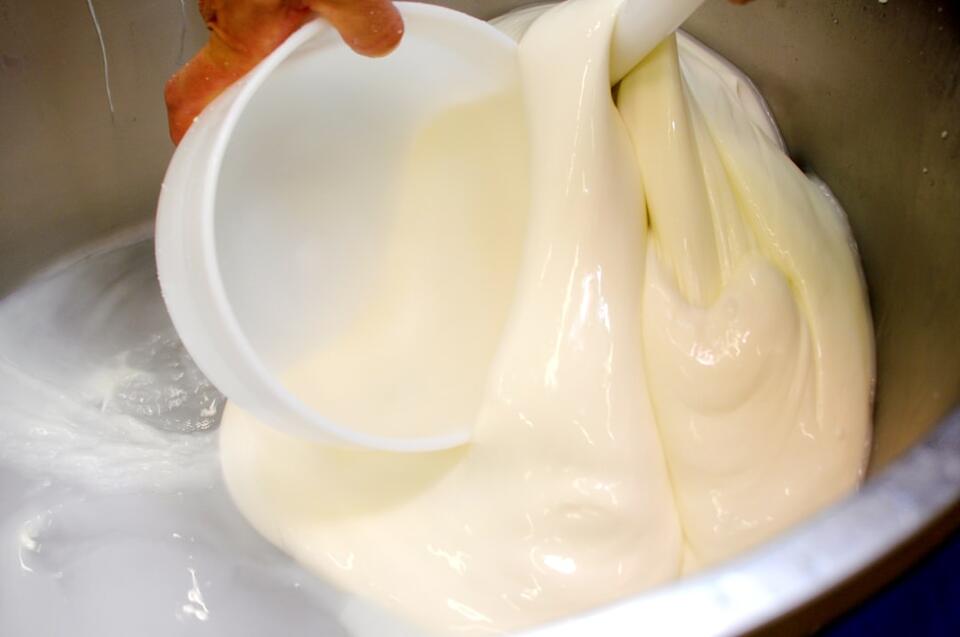
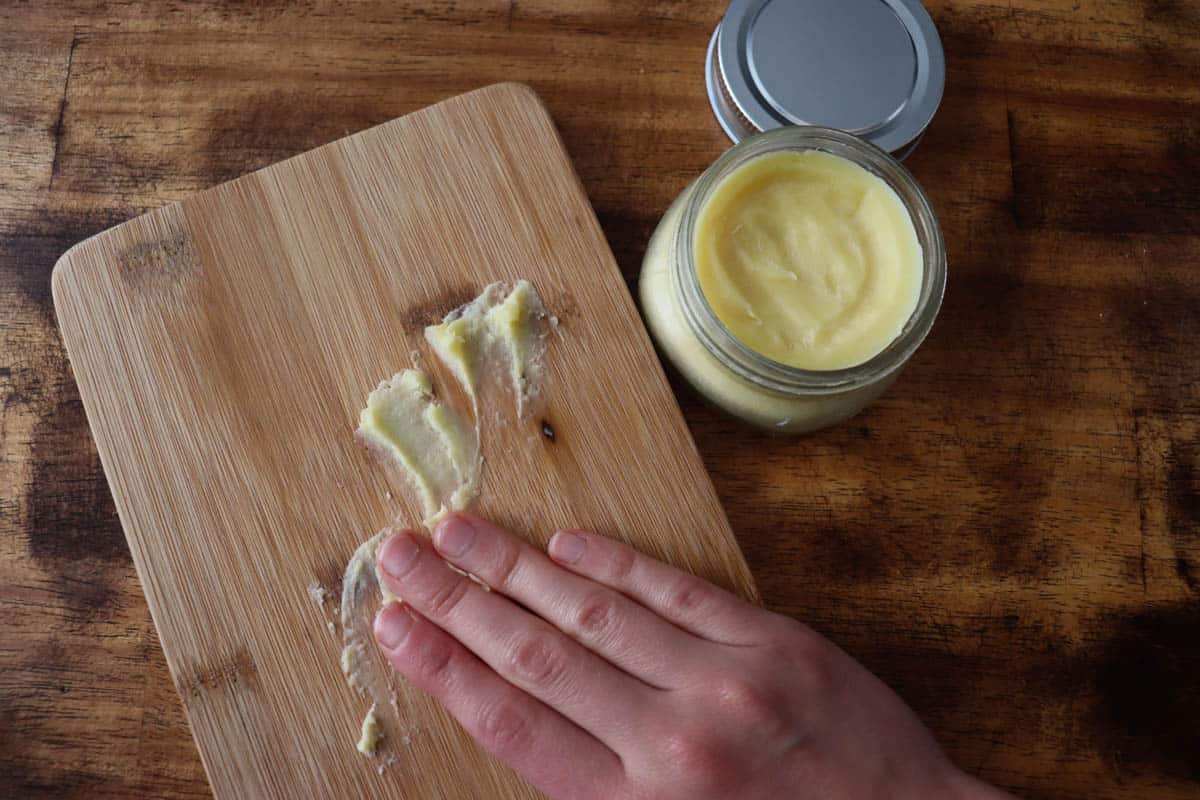
RapidRaven+FollowHomemade Butter in 20 Minutes? Yes, It’s That Simple 🧈Making butter at home surprised me with how straightforward it actually is. I just poured heavy cream into a stand mixer and let it whip until it turned thick, then separated into butter and buttermilk. Rinsing the butter under cold water helped get rid of any leftover buttermilk, which keeps it fresher. The flavor is noticeably richer than anything I’ve picked up at the store. For a tangier, old-fashioned taste, I added a spoonful of plain yogurt to the cream and let it sit at room temperature for a few hours before churning. That little step made a big difference in the final flavor, giving it that cultured butter vibe you rarely find in stores. The process only took about 20 minutes of actual work, and the result was worth it for the taste alone. #homemadebutter #fromscratch #kitchentips #Food #Cooking30Share
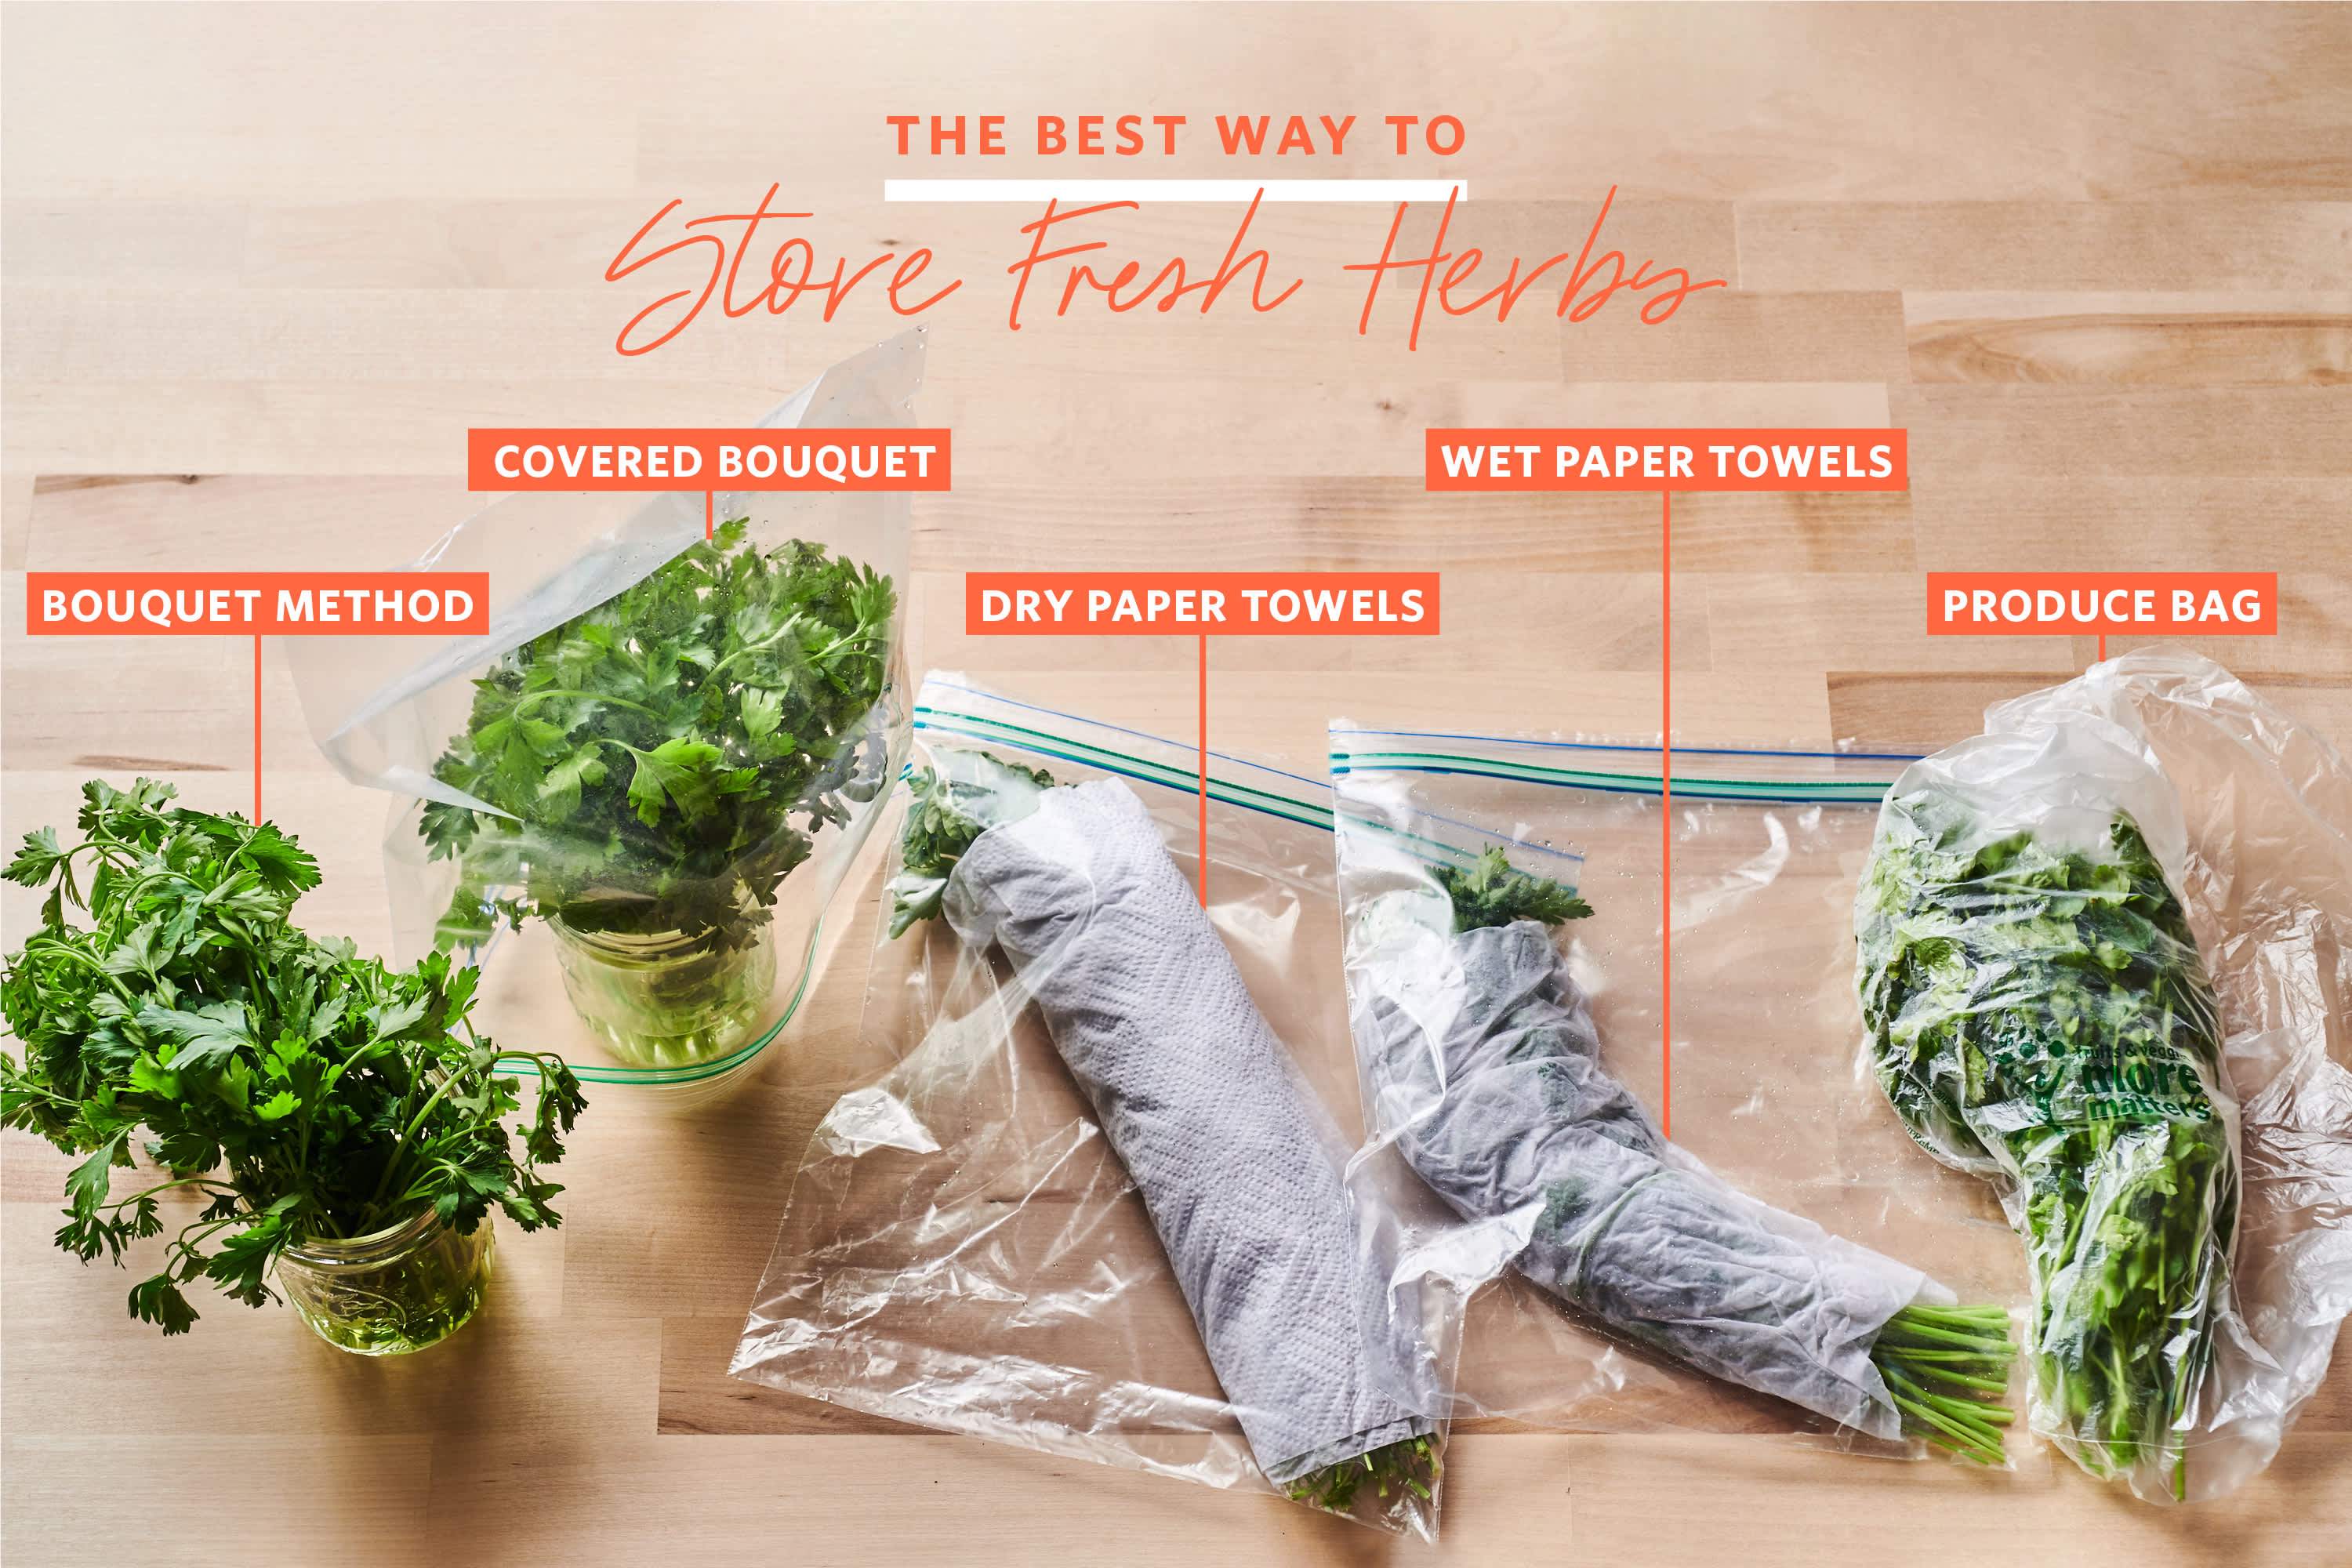
RavenousRaccoon+FollowWould You Try This Clever Kitchen Hack for Fresh Herbs?Would you use this trick? I recently stumbled upon a hack for keeping herbs fresh way longer—simply wrap them in a damp paper towel and pop them in a resealable bag in the fridge. I tried it last week with cilantro, and it stayed crisp and vibrant for almost two weeks! I used to waste so many bunches because they wilted so fast, but this little change has saved me money and made meal prep so much easier. It honestly felt like a small win in my daily routine. Would you give this a shot, or do you have your own herb-saving secrets? Let me know in the comments! #LifeHacks #KitchenTips #SaveMoney10Share
FrostyFalcon+FollowPeeling Grapes for Jam or Salads? Here’s How I Do ItFirst, rinse your grapes under cold water and make sure they’re super clean. Pull each grape off the stem and toss any with broken skins. For the knife method, grab a sharp paring knife and make a few shallow cuts along the grape’s skin. Gently slide the blade under the skin and peel it back, working your way around until the grape is bare. Don’t rush—these little guys are slippery! If you want to peel a bunch fast, try blanching. Boil water, dunk the grapes for 5-10 seconds, then toss them in ice water for another 10 seconds. The skins slip right off when you pinch them. Super easy for a big batch! Both ways work, just depends on how many you need to peel and how much time you’ve got. #kitchentips #graperecipes #homemadejam #Food #Cooking00Share
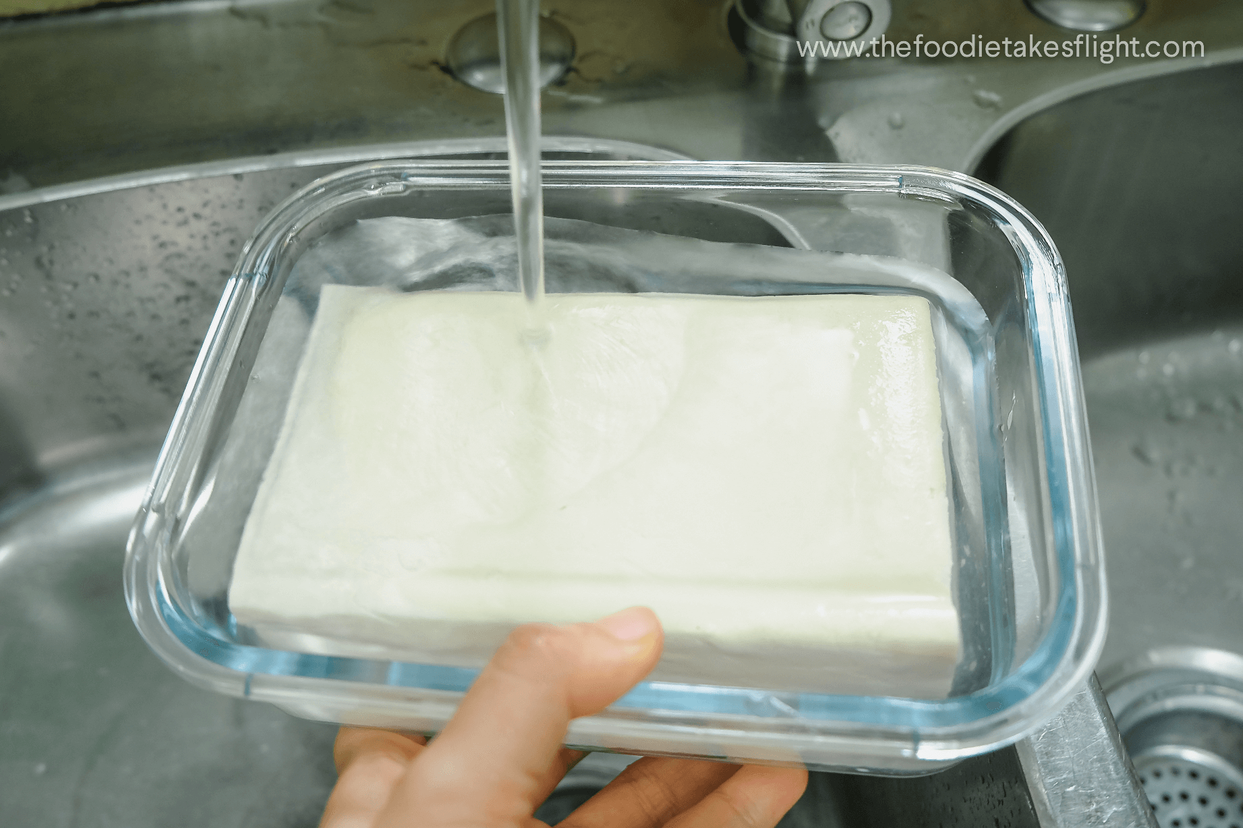
Robert Hunt+FollowTofu Storage Made SimpleKeep tofu in its original packaging until you’re ready to use it. Once opened, transfer it to an airtight container. Always cover tofu with filtered water in the container—this keeps it from drying out. Change the water every day to keep things fresh. If you’ve cooked or flavored your tofu, just store it in an airtight container without water. For long-term storage, toss unopened tofu straight into the freezer. Opened tofu can be frozen too—just drain it first and use a freezer bag. Watch for spoilage: tofu should stay white and smell neutral. If it turns beige or sour, toss it. Fridge tofu lasts 3-5 days; frozen tofu is good for up to 5 months. Tofu is super handy, but you’ve got to store it right! #tofu #kitchentips #foodstorage #Food #Cooking10Share
AzureAntelope+FollowCrispy Buns, Soft Centers: My Toasting RoutineSlice your buns in half if they aren’t already. This helps both sides get that perfect texture. Choose your method: If you’re in a rush, a toaster works great—just pop them in like regular bread. For more control, use a skillet with a little butter over medium heat and press the buns down for a minute or two. For a big batch, broil them in the oven, cut side up, for 1-2 minutes. Watch closely—they toast fast! If you’re grilling, place the buns cut side down on the grill for about 30 seconds. They’ll pick up some smoky flavor, too. I love how each method gives a slightly different result. Experiment and see which one you like best! #ToastedBuns #KitchenTips #BakingHacks #Food #Cooking50Share